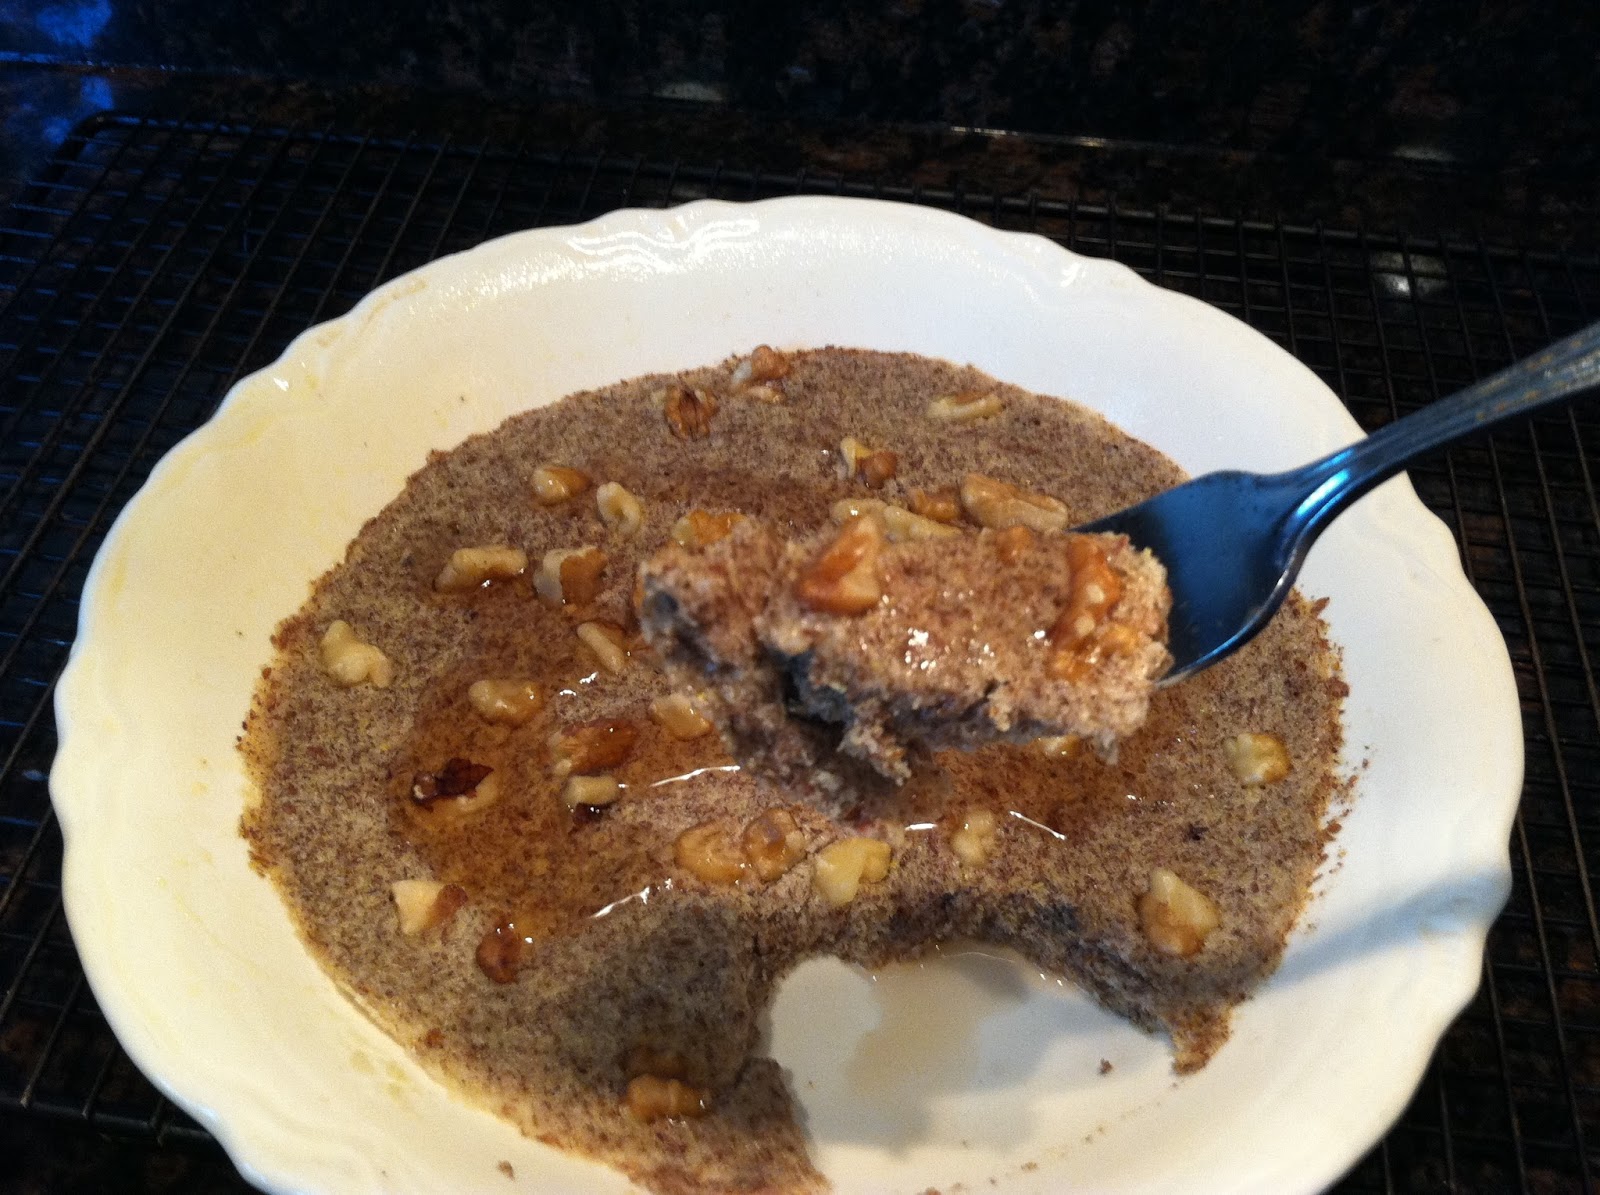
Ever notice that you really want something after being told you can't have it? I never was a fan of pancakes because I always got a tummyache after eating them. Since finding out that I'm gluten sensitive what do I crave? You got it - Pancakes!
After trying some ok and some really terrible gluten free pancakes, I found one that is wheat free, sugar free, filling, satisfying, great tasting and fast. I can have this on the table in 2 minutes. Literally.
How? The microwave! Yep, you bake this in the microwave.
The Ingredients
My BFF ground flaxseed takes center stage in this recipe. I add a little GF flour to give it a better texture, but you can leave it out. This time I used brown rice flour, other flours also work. I don't recommend soy flour, messes with the flavor.
Spray a microwaveable pie plate with non stick, add the wet ingredients and whisk.
Combine the dry ingredients in another bowl.
Add them to the wet ingredients and whisk to combine.
Sprinkle with walnuts.
Microwave 1 minute 30 seconds on high.
Enjoy with some sugar free pancake syrup.
Gluten-Free Pancake
1 serving
1 tablespoon oil
1 1/2 tablespoons sugar free vanilla syrup (OR 1 Tablespoon Splenda + 1 1/2 Tablespoons water + 1/4 teaspoon vanilla extract)
1 egg white (3 tablespoons from the carton)
1/4 cup ground flaxseed
1 Tablespoon Gluten Free flour (rice, almond and coconut are all good)
1/8 teaspoon cinnamon
1/8 teaspoon baking soda
1/8 teaspoon baking powder
1 Tablespoon chopped walnuts
Spray a microwave safe pie plate with non-stick. Add the wet ingredients and whisk.
Combine the dry ingredients and whisk into the wet until well combined.
Sprinkle with walnuts.
Microwave 1 minute 30 seconds on High.
Serve right from the pie plate. (Why dirty another plate?)
Let me know if you try this.
Showing posts with label recipe. Show all posts
Monday, July 1, 2013
Monday, May 13, 2013
Gluten-Free Flatbread
Pinterest to the rescue. I found this flatbread recipe Gluten-Free Flatbread. It called for Gluten Free All Purpose Flour. Every brand in the stores contain sugar. Back to Pinterest. I found this gluten-free flourmix. It's good, but the coconut flour gives it a slightly coconutty flavor that doesn't work with Pulled Pork. So I tried again and subbed Almond Meal for my Pulled Pork leftovers. I'll be trying another version of gluten-free flour blend using garbanzo bean flour soon. Then I'll have an assortment of blends and will be able to pick the blend for the recipe. The coconut flour version is perfect for sweets.
In using and revising this recipe, I found that 2 large eggs works better than the extra large egg plus egg white called for, and that almond meal is not as thirsty as coconut flour, so I had to decrease the liquid. I also had best results using the convection feature on my oven. I tried baking one cookie sheet lined with a Silpat and the second on parchment paper. Using a Silpat caused the flatbread to be soggy in the middle. Here's my current adaptation:
Gluten-Free Flatbread
2 cups Gluten Free Flour Blend (see below)
1 1/2 teaspoons baking powder
1 teaspoon salt
1 tablespoon olive oil
2 large eggs
1/4 cup unflavored, unsweetened milk (cow, almond, soy)
1/4 cup water
Place oven racks and 2 lowest positions. Preheat oven to 425F and use convection if available.
Combine dry ingredients.
Add oil, eggs and milk.
Slowly add warm water. You want a soft, wet dough.
Use an ice cream scoop to portion out 6 scoops onto 2 parchment lined cookie sheets.
Use wet fingers to smooth each into thin 5" circles.
Bake 8 minutes for convection/10 minutes regular oven.
Remove from oven and flip each using a pancake turner.
Return to oven with the pan that was on the upper rack in the lower position.
Bake 8 minutes longer.
Remove to wire rack to cool.
Store at room temperature in a zip top bag.
These are flexible; you can hold the sandwiches like a taco. They are also very filling.
Gluten-Free Flour Blend
1 cup brown rice flour
1 cup GF certified oat flour
1 cup almond flour/meal
1 cup tapioca flour
1/4 cup cornstarch
1 tablespoon + 1/2 teaspoon xanthan gum
Combine in a zip top bag.
Saturday, May 11, 2013
Easy 3 Bean Crockpot Chili
Everything gets stirred together in the crockpot, cover on, set to Low and off I go.
Stirring the crushed tomatoes and tomato paste into the raw meat will allow the meat to cook without forming large clumps. I love how forgiving this recipe is - sometimes I add some diced jalapeno instead of, or in addition to, the sweet pepper, sometimes I leave out the diced tomatoes or use ground turkey instead of beef. Prefer a vegetarian chili? Leave out the meat altogether.
After everything is combined, sprinkle the cocoa powder over the top. Once your cooker heats up, the cocoa powder will melt. You can stir it in anytime after it melts. If you try to stir it in when it's still dry, it will clump. Let it cook at least 30 minutes longer after stirring in the melted cocoa powder to allow flavors to blend. You will not taste cocoa, you will taste rich silkyness.
Notice how stiff the mixture looks. It will thin out a bit once it cooks, but this is a thick chili. If it's too thick for your taste, you can add additional broth after it's finished cooking.
Easy 3 Bean Crockpot Chili
1 lb. ground sirloin
1 (14-16 oz.) can crushed tomatoes or tomato sauce
1 (6 oz.) can tomato paste
2 tablespoons dried chopped onion
1 tablespoon paprika
2 - 3 tablespoons chili powder
1 teaspoon cumin
1 teaspoon minced garlic OR 1/4 teaspoon dried
1/2 teaspoon ground black pepper
2 (14-16 oz.) cans chili beans
2 (14-16 oz.) cans beans, drained and rinsed (black, pinto, red, great northern)
1 (14-16 oz.) can diced tomatoes, undrained
1/2 of a sweet bell pepper, diced (any color)
1/2 cup beef broth or water
2-3 teaspoons unsweetened cocoa powder
Spray interior of crockpot with non-stick.
Add ground beef, crushed tomatoes, tomato paste and spices. Stir until smooth.
Add beans, tomatoes, bell pepper and broth; stir gently to combine.
Sprinkle cocoa powder evenly over top.
Put lid on, turn on Low and cook 5 - 8 hours. It gets better the longer it cooks.
Tuesday, April 30, 2013
Gluten Free, Grain Free Pizza
Walt and I are having wonderful success on South Beach. I'm down 28 lbs., Walt has lost 33! The problem is, it restricts grain, and we're bread people. Walt was missing pizza. (I could do without pizza, since I almost always had a tummy-ache afterwards). To satisfy our bread cravings, I looked for grain-free breads and found a recipe for Socca, a flatbread from France that uses garbanzo bean flour instead of wheat flour. I had my doubts, but went to Woodman's, bought some Bob's Red Mill Garbanzo Bean Flour and gave it a try.
The method is entirely different from wheat crust - no yeast (!) and it's made from a watery batter. Hint: Wipe up any spills, it dries like concrete!
Equal parts garbanzo bean flour and water plus salt, seasonings and olive oil are whisked together. It's poured into two screaming hot skillets and baked for 20 minutes. That baked crust is very different. Different can be yummy, too.
The toppings must be fully cooked before adding to the crust, because it's topped and then put under the broiler only long enough to melt the cheese. I microwave the veggies with a little water in a covered dish. My pepperoni pizza below has Pastorelli brand sauce, thinly sliced onions, red bell pepper, turkey pepperoni and reduced fat cheese.
My Margherita pizza has my own white garlic cheese sauce, grape tomatoes, fresh basil leaves and reduced fat cheese.
The white garlic sauce is very easy to make from cream cheese, minced garlic, cottage cheese and parmesan cheese. Just whizz them together in a mini food processor (or stir in a bowl).
For the Crustmakes 2 10" crusts
1 1/2 cups garbanzo bean flour
1 1/2 cups water
1 tablespoon + 1 1/2 teaspoons Italian seasoning blend
1 teaspoon salt
1 tablespoon olive oil
extra olive oil for the skillets
Whisk together. Set aside while heating oven and skillets.
If your broiler is at the top of your oven, place one oven rack at the uppermost slot. Another rack should be on the middle slot. Place two 10" cast iron skillets in oven on the middle slot. Preheat oven to 450F. When oven and skillets are hot, remove and add 1 tablespoon olive oil to each skillet. Swirl to coat bottom of skillets.
Add half of batter to each skillet. Swirl to coat evenly - kinda like making a crepe. Put skillets back in oven and bake 20 minutes.
For the Toppings
While crusts are baking, slice and cook any toppings (except the cheese, natch). I microwave sliced onion until limp; sweet peppers until just tender. Pepperoni is already fully cooked, but if I make sausage pizza, I cook it thoroughly then drain very well on paper towels.
For the Red Sauce
We like canned Pastorelli pizza sauce or Sweet Baby Ray's barbeque sauce.
White Garlic Cheese Sauce
2 Tablespoons cream cheese
2 Tablespoons cottage cheese
2 Tablespoons parmesan cheese
1 teaspoon minced garlic
Whizz together in mini food processor or stir together until the cottage cheese is smooth.
Doctoring the Crust
When the crusts are done, remove from the oven and wrap a towel around the skillet handles to remind you that they're screaming hot. Turn the oven off and the broiler on High.
Spread crusts with a small amount of sauce - 2 tablespoons or less. Add pre-cooked toppings and cheese. Sprinkle with additional Italian seasoning, salt and pepper, whatever you like. I like Lawry's Seasoned Salt. Place under broiler until cheese melts. Let it brown as much as you enjoy.
Remove from broiler onto sturdy cooling racks (or your stove grates). Using a thin metal spatula, loosen crust and slide out onto a cutting board. Let rest a couple minutes before slicing.
Serve with cold beer or soda.
Unexpected Bonus 1 - NO more Pizza tummy-aches for me!
Unexpected Bonus 2 - cast iron skillets get very well seasoned!
What do you do when you have lots of leftover sauce? Using two tablespoons per pizza, the 16 oz. can of sauce goes a long way. It will go bad in the fridge before I can use it all. So I froze it in an ice cube tray from the dollar store, popped out the frozen cubes and put them in a zip top bag. On Pizza
What do you put on your pizza?
Labels:
bread,
cooking,
dinner,
freezer,
healthy,
Household Hints,
recipe,
South Beach
Wednesday, April 3, 2013
Skillet Chops with Mushroom Whiskey Peppercorn Sauce
I was gone a long time. Many things took up my time. Volunteering, helping my in-laws, Thanksgiving, Christmas, New Year's Eve, Valentine's Day and Easter. The best thing that took time wasn't a thing. It was a tiny, perfect human named Naomi Dawn. She is my newest grandbaby, born in February, and she has the entire family wrapped around her tiny fingers. Who wouldn't love such a happy baby?
I've gotten a wee bit smaller. At the New Year, my husband suggested we go without potatoes, noodles, rice or bread and see what happened. Yikes! My immediate thought was "What's left?!? This won't last a week!" So I started doing a little research and re-discovered The South Beach Diet. I say re-discovered, because several of our favorite meals are South Beach, BUT we had never followed the program.
Summer Squash with Parm
1 T. EVOO
2 cloves garlic, minced or pressed
1/2 medium onion, sliced
2 medium summer squash, cut in 3" strips
1/4 cup chicken broth
1/4 cup parmesan, shredded
Heat skillet over medium heat. Add EVOO when hot.
Add garlic and onions, stir to coat. Cook until onions wilt.
Add squash.
Cover and cook 3-4 minutes, turning gently several times.
Add broth, cover and cook until tender, about 5 minutes.
Serve with 1 T. parmesan cheese
Serves 4
Her older brother and sister have grown too.
I've gotten a wee bit smaller. At the New Year, my husband suggested we go without potatoes, noodles, rice or bread and see what happened. Yikes! My immediate thought was "What's left?!? This won't last a week!" So I started doing a little research and re-discovered The South Beach Diet. I say re-discovered, because several of our favorite meals are South Beach, BUT we had never followed the program.
So I borrowed several South Beach Diet books from the library and dug in. After a rough week, our starch and sugar cravings faded. Oh yes - NO sugar. Twelve weeks later I'm down 23 lbs. and my hubs is down 28. Not bad.
Here's what we had for dinner last night:
Skillet Chops with Mushroom Whiskey Peppercorn Sauce
For chops:
4 thick cut boneless pork chops
course ground black pepper
salt
1 T. EVOO
1 T. butter
Season chops with salt and pepper. Heat a cast iron skillet over medium-high heat until hot. Add oil and butter. Swirl to combine and coat bottom of skillet. Add chops.
Brown well on both sides, about 4 minutes per side; then lower heat, cover and cook an additional 10 minutes. Remove from pan and cover while making sauce.
For Mushroom Whiskey Peppercorn Sauce:
1 T. EVOO
1 T. butter
1 lb. mushrooms, sliced
1/2 cup onion, sliced
2 -3 garlic cloves, minced or pressed
1/2 tsp. peppercorns, slightly crushed (optional)
3/4 cup reduced fat, low-sodium chicken stock or broth
1/2 cup half and half
2 T. balsamic vinegar
1/3 cup whiskey (I used Seagrams VO, Jack Daniel's would also be good)
Preheat oven to 400F.
In same skillet you cooked the chops add EVOO and butter, swirl to coat skillet. Add mushrooms and onions. Cook over medium high heat until well browned (Brown = flavor), turning with a spatula every couple of minutes. It will take 10 - 15 minutes depending on the water content of the mushrooms.
Add garlic and peppercorns, stir. Add chicken stock and balsamic vinegar and stir to loosen browned bits from skillet. Add half and half, stir. Remove pan from flame and add whiskey. Bring to a boil, reduce heat and simmer until sauce thickens slightly.
Add chops and any juices to skillet. Place in preheated oven 10 minutes to finish cooking.
Test temperature for doneness. Serves 4 (6 if you're on South Beach)
Along side the chops, serve:
Summer Squash with Parm
1 T. EVOO
2 cloves garlic, minced or pressed
1/2 medium onion, sliced
2 medium summer squash, cut in 3" strips
1/4 cup chicken broth
1/4 cup parmesan, shredded
Heat skillet over medium heat. Add EVOO when hot.
Add garlic and onions, stir to coat. Cook until onions wilt.
Add squash.
Cover and cook 3-4 minutes, turning gently several times.
Add broth, cover and cook until tender, about 5 minutes.
Serve with 1 T. parmesan cheese
Serves 4
Stay tuned and find out how I make pizza without wheat flour. Gluten Free!
Labels:
cooking,
dinner,
gluten-free,
healthy,
recipe,
South Beach
Monday, April 9, 2012
Gluten-Free Warm Roasted Chicken Salad with Brown Rice Pasta
Tonight I Cleared Out the Fridge for Dinner
We had some veggies that were beginning to look a little "aged" so I roasted them with chicken breast and made this very satisfying Warm Roasted Chicken Salad with Whole Wheat Penne. It's my adaptation of Dr. Oz's Warm Chicken-Orzo Salad recipe and very healthy.
I managed to improve on Dr. Oz's nutritional counts by eliminating the goat cheese and swapping the orzo for whole wheat pasta, lowering the Total calories to 360 per serving (Dr. Oz's: 420), total carbs to 36.7g (Dr. Oz's: 41g), fat to 10.5g (Dr. Oz's: 14g), total cholesterol to 72.6mg (Dr. Oz's: 79mg). He did better on sodium, because I salt my pasta water. Leave it out and reduce the sodium to 325 mg.
Warm Roasted Chicken Salad with Brown Rice Penne
We had some veggies that were beginning to look a little "aged" so I roasted them with chicken breast and made this very satisfying Warm Roasted Chicken Salad with Whole Wheat Penne. It's my adaptation of Dr. Oz's Warm Chicken-Orzo Salad recipe and very healthy.
| Warm Roasted Chicken Salad with Whole Wheat Penne |
Warm Roasted Chicken Salad with Brown Rice Penne
Adapted from Dr. Oz’s Warm Chicken-Orzo Salad
4 Servings
30 minutes
1 pint grape tomatoes, rinsed
1 red bell pepper, seeded and cut into ½” chunks
4 ribs celery, cut into sticks, then ½” pieces
3 cloves garlic, minced
2 tablespoons extra virgin olive oil, divided use
¼ teaspoon dried oregano, divided use
1 teaspoon salt, divided use
1/8 teaspoon black pepper
1/8 teaspoon lemon pepper
1 lb. boneless, skinless chicken breasts, trimmed
1 ½ cups brown rice penne pasta
2 tablespoons bottled lemon juice
Preheat oven to 450F.
Heat water to cook pasta.
On one side of an 18x12” jelly roll pan, toss vegetables
with garlic, 1 tablespoon oil, and 1/8 teaspoon each oregano, black pepper and salt. Spread in an even layer.
Cut chicken breasts in half like a book, making 2 cutlets
of each; then cut into 1” chunks.
On the other side of the same jelly roll pan, toss chicken with 1 tablespoon oil and 1/8 teaspoon each lemon pepper, oregano and salt.
Spread in an even layer.
Roast 15 minutes or until chicken is done (160F).
When pasta water comes to a boil, add ½ teaspoon salt and
cook pasta following label directions while chicken and vegetables roast. Drain and put into a heatproof bowl large
enough to hold pasta, chicken and vegetables.
When chicken and vegetables are done, add them and their
juices to the bowl with pasta.
Add lemon juice and toss well.
Divide onto 4 serving plates.
Printable recipe for Warm Roasted Chicken Salad with Whole Wheat Pasta, substitute brown rice pasta to make it gluten-free.
Saturday, November 19, 2011
Happy Birthday Nick!
Today is Nick's 85th birthday. I baked a bundt cake for him and put a simple glaze on it. If you've been reading my blog for very long, you'll remember that bundt cakes and I have a love/hate relationship. I love bundt cakes, they hate to leave the pan. Their reluctance to leave their pan has resulted in mayhem like this:
which necessitated last minute creativeness like this Trifle:
It was truly yummy, but I don't need a repeat. That NONSTICK pan was oiled and floured and still - disaster resulted. All because bundt cakes like to stay in the pan. I had to devise a way to form a crust that would s-l-i-d-e out of the pan. And patience. I need to let it cool down.
So here's my Super Duper Bundt Pan Solution: equal parts all purpose flour and vegetable oil. Just stir them together and paint the inside of your bundt pan with a pastry brush. (Be sure to smell the pastry brush to avoid the garlic bread pastry brush). Add your batter, bake until done. ALLOW TO COOL at least 40 minutes on a rack before unpanning. The caps are for my benefit. I'm sure you'll be patient and let it cool without needing such a stern reminder.
Let it cool to room temperature on a wire rack, then make the glaze:
Cake Glaze
2 cups confectioner's/powdered/10X sugar
2 Tablespoons white corn syrup (clear Karo)
2 Tablespoons hot tap water
1/2 teaspoon your choice extract (almond, lemon, orange, vanilla, mint)
Place sugar, syrup and water in a large microwaveable bowl. Stir to moisten. It will be clumpy. Microwave 30 seconds on high. Stir and scrape down the bowl. Microwave 15 seconds on high, stir. Repeat until it becomes smooth and pourable, about the consistency of pancake batter. Don't let it boil. Stir in the extract. If you're using lemon or orange extract, adding 1/2 teaspoon lemon or orange rind (or both!) is very good, but I wouldn't use it with other extracts.
Place the cake, still on the cooling rack, over a plate to catch drips and spoon the glaze over the cake, spreading it with the back of the spoon to cover as much or as little as you like. Let it set up at least 15 minutes before moving to your serving plate.
This glaze sets up with a shiny, dry finish. The underneath stays soft; almost fudgy in consistency.
Today is Nick's 85th birthday. I baked a bundt cake for him and put a simple glaze on it. If you've been reading my blog for very long, you'll remember that bundt cakes and I have a love/hate relationship. I love bundt cakes, they hate to leave the pan. Their reluctance to leave their pan has resulted in mayhem like this:
which necessitated last minute creativeness like this Trifle:
It was truly yummy, but I don't need a repeat. That NONSTICK pan was oiled and floured and still - disaster resulted. All because bundt cakes like to stay in the pan. I had to devise a way to form a crust that would s-l-i-d-e out of the pan. And patience. I need to let it cool down.
So here's my Super Duper Bundt Pan Solution: equal parts all purpose flour and vegetable oil. Just stir them together and paint the inside of your bundt pan with a pastry brush. (Be sure to smell the pastry brush to avoid the garlic bread pastry brush). Add your batter, bake until done. ALLOW TO COOL at least 40 minutes on a rack before unpanning. The caps are for my benefit. I'm sure you'll be patient and let it cool without needing such a stern reminder.
Let it cool to room temperature on a wire rack, then make the glaze:
Cake Glaze
2 cups confectioner's/powdered/10X sugar
2 Tablespoons white corn syrup (clear Karo)
2 Tablespoons hot tap water
1/2 teaspoon your choice extract (almond, lemon, orange, vanilla, mint)
Place sugar, syrup and water in a large microwaveable bowl. Stir to moisten. It will be clumpy. Microwave 30 seconds on high. Stir and scrape down the bowl. Microwave 15 seconds on high, stir. Repeat until it becomes smooth and pourable, about the consistency of pancake batter. Don't let it boil. Stir in the extract. If you're using lemon or orange extract, adding 1/2 teaspoon lemon or orange rind (or both!) is very good, but I wouldn't use it with other extracts.
Place the cake, still on the cooling rack, over a plate to catch drips and spoon the glaze over the cake, spreading it with the back of the spoon to cover as much or as little as you like. Let it set up at least 15 minutes before moving to your serving plate.
This glaze sets up with a shiny, dry finish. The underneath stays soft; almost fudgy in consistency.
| Nick and Anna. Two of my very favorite people. |
Saturday, August 27, 2011
Three Winning Crockpot Recipes
It's canning season, which means even though I'm cooking all day, I have very little time to cook dinner. So, I've been using my crockpot for several meals each week and I've found three that are easy, inexpensive and delicious.
The first is a variation on a recipe that was very, very salty the first time I made it. So I changed it up a bit and omitted a second salty seasoning package. If you like lots of salt, you can add in a package of Au Jus mix.
Cube Steaks with Gravy for the Crockpot
2 lbs. cube steaks
1 can Low-Sodium Golden Mushroom Soup, undiluted
1 can Low-Sodium French Onion Soup, undiluted
1 envelope Brown Gravy mix
Spray the interior of your crockpot with non-stick. Lay the cube steaks in one layer, arranging to overlap as little as possible.
Combine soups and gravy mix in a small bowl. Pour over.
Cover and cook on low 8 hours. Very, very good served hot sandwich style on hearty white bread.
Chicken Cordon Bleu for the Crockpot
I made real chicken cordon bleu when I wasyoung and insane childless in my early 20's. It took forever to prepare, but was heaven to eat. First you had to pound the chicken breasts very thin, then layer on ham and swiss cheese, then roll them up, bread them, saute them and finally bake them. It took F O R E V E R. One day, I vowed never again! However, every now and then I'd get a hankering and buy some frozen ones, hoping they'd satisfy. Trust me, those little frozen bundles don't even come close.
This recipe is even easier than the frozen ones, and far better all around. It hits all the flavor and texture notes of the labor intensive version. The chicken stays moist and tender, the cheese is melty, the ham is sweet and salty and the stuffing mix adds the crisp breading texture and flavor. Best of all, this is a plop and cook meal.
6 boneless, skinless chicken breasts
6 slices deli ham, or sandwich slices
6 - 12 slices swiss cheese, enough to cover each breast
1 can low-sodium cream of chicken soup (the cheese, ham and stuffing mix are salty)
1 (6 oz.) box chicken stuffing mix
1/4 cup (1/2 stick) butter, melted
Spray your crockpot with non-stick.
Combine milk and soup in a bowl. Pour half into the bottom of the crockpot. Add chicken in one layer, arranging to overlap as little as possible.
Place a slice of ham on each breast, then cheese.
Pour remaining soup mixture evenly over all.
Sprinkle evenly with stuffing mix. If your mix comes with a seasoning packet, sprinkle it over.
Drizzle with melted butter.
Cover and cook on low 6 to 8 hours. Note: any stuffing that falls into the gravy will soak it up. If you like wet stuffing, you'll love it. If not, don't spoon the gravy from the bottom of the pot over the stuffing when you serve it.
Beef Strogonoff for the Crockpot
If you've ever made strogonoff, you know it's easy but tricky and expensive. The expensive part is the original recipe calls for beef tenderloin aka filet mignon. The tricky part is getting the beef cooked just so. Cook beef tenderloin too long and it gets dry and tough. This recipe solves that with stew meat. Stewing meat is a mixture of cuts, mostly chuck, which is very flavorful, but chewy. The long, moist cooking makes stew beef nice and tender. Like many of my recipes, this is one I found and changed to make better. In this case, I added a tiny bit of bacon and browned the meat. Doing this added tons of flavor without much expense or time. I browned the beef the night before and refrigerated it. The next morning, I just tossed everything in the cooker and turned it on. If you're short on time, you can omit the browing step, but the flavor won't be as rich. The sour cream is added at the end, without cooking, so it doesn't curdle. I like it better without.
1 lb. beef stew meat, cut in about 1/2" chunks
salt and pepper
1/2 cup flour
1/4 cup olive oil
2 strips bacon, diced (I cut my bacon with kitchen shears right into the pan)
1/4 cup water
1 can low-sodium Golden Mushroom soup, undiluted
1/2 cup onion, chopped
1 tablespoon worcestershire sauce
1/2 cup sour cream, plain yogurt or cream cheese (optional)
Pat the beef dry with paper towels. Season the flour with salt and pepper in a large bowl. Add the beef and toss to coat. Shake off excess flour from beef and throw away the extra flour. The extra makes it easier to coat the beef.
Heat a large, high sided pan over medium heat. I use my dutch oven - the high sides help trap the spatters. Add 1 - 2 tablespoons oil, enough to coat the bottom well, and allow to heat a few seconds. Add the chopped bacon. Cook and stir until bacon is almost crisp. Remove it to a paper towel lined heat proof bowl with a slotted spoon.
Working in batches scatter some beef in the hot oil. Don't crowd the pan. Putting less meat in will let it brown faster. It usually takes me 3 batches to brown up one pound of meat. Cook without stirring for at least 3 minutes. Turn over a piece and see if it's browned, if it is, stir them all to brown the other side. When both sides are browned, remove with slotted spoon to the paper towel lined bowl. Add more oil to the pan if needed and brown up all the beef.
After all the beef is browned, if there are any burnt patches are on the bottom of the pan, scrape them off and throw away or your gravy will taste burnt. Add water to the pan and stir to scrape up all that browned goodness. (The French call it fond, Emeril calls it The Love). Remove the paper towel from the bowl and discard. Add that browned lovely liquid to the beef in the bowl. It may have thickened a bit from the flour left in the pan, and that's ok.
At this point, you can cover and refrigerate the beef for later use.
The next morning:
Spray your crockpot with nonstick. Combine all ingredients right in the crockpot. Cover and cook on low 8 hours.
JUST BEFORE serving, quickly stir in the dairy. Don't cook it or the dairy may curdle.
Serve over hot cooked noodles.
The first is a variation on a recipe that was very, very salty the first time I made it. So I changed it up a bit and omitted a second salty seasoning package. If you like lots of salt, you can add in a package of Au Jus mix.
Cube Steaks with Gravy for the Crockpot
2 lbs. cube steaks
1 can Low-Sodium Golden Mushroom Soup, undiluted
1 can Low-Sodium French Onion Soup, undiluted
1 envelope Brown Gravy mix
Spray the interior of your crockpot with non-stick. Lay the cube steaks in one layer, arranging to overlap as little as possible.
Combine soups and gravy mix in a small bowl. Pour over.
Cover and cook on low 8 hours. Very, very good served hot sandwich style on hearty white bread.
Chicken Cordon Bleu for the Crockpot
I made real chicken cordon bleu when I was
This recipe is even easier than the frozen ones, and far better all around. It hits all the flavor and texture notes of the labor intensive version. The chicken stays moist and tender, the cheese is melty, the ham is sweet and salty and the stuffing mix adds the crisp breading texture and flavor. Best of all, this is a plop and cook meal.
6 boneless, skinless chicken breasts
6 slices deli ham, or sandwich slices
6 - 12 slices swiss cheese, enough to cover each breast
1 can low-sodium cream of chicken soup (the cheese, ham and stuffing mix are salty)
1 (6 oz.) box chicken stuffing mix
1/4 cup (1/2 stick) butter, melted
Spray your crockpot with non-stick.
Combine milk and soup in a bowl. Pour half into the bottom of the crockpot. Add chicken in one layer, arranging to overlap as little as possible.
Place a slice of ham on each breast, then cheese.
Pour remaining soup mixture evenly over all.
Sprinkle evenly with stuffing mix. If your mix comes with a seasoning packet, sprinkle it over.
Drizzle with melted butter.
Cover and cook on low 6 to 8 hours. Note: any stuffing that falls into the gravy will soak it up. If you like wet stuffing, you'll love it. If not, don't spoon the gravy from the bottom of the pot over the stuffing when you serve it.
Beef Strogonoff for the Crockpot
If you've ever made strogonoff, you know it's easy but tricky and expensive. The expensive part is the original recipe calls for beef tenderloin aka filet mignon. The tricky part is getting the beef cooked just so. Cook beef tenderloin too long and it gets dry and tough. This recipe solves that with stew meat. Stewing meat is a mixture of cuts, mostly chuck, which is very flavorful, but chewy. The long, moist cooking makes stew beef nice and tender. Like many of my recipes, this is one I found and changed to make better. In this case, I added a tiny bit of bacon and browned the meat. Doing this added tons of flavor without much expense or time. I browned the beef the night before and refrigerated it. The next morning, I just tossed everything in the cooker and turned it on. If you're short on time, you can omit the browing step, but the flavor won't be as rich. The sour cream is added at the end, without cooking, so it doesn't curdle. I like it better without.
1 lb. beef stew meat, cut in about 1/2" chunks
salt and pepper
1/2 cup flour
1/4 cup olive oil
2 strips bacon, diced (I cut my bacon with kitchen shears right into the pan)
1/4 cup water
1 can low-sodium Golden Mushroom soup, undiluted
1/2 cup onion, chopped
1 tablespoon worcestershire sauce
1/2 cup sour cream, plain yogurt or cream cheese (optional)
Pat the beef dry with paper towels. Season the flour with salt and pepper in a large bowl. Add the beef and toss to coat. Shake off excess flour from beef and throw away the extra flour. The extra makes it easier to coat the beef.
Heat a large, high sided pan over medium heat. I use my dutch oven - the high sides help trap the spatters. Add 1 - 2 tablespoons oil, enough to coat the bottom well, and allow to heat a few seconds. Add the chopped bacon. Cook and stir until bacon is almost crisp. Remove it to a paper towel lined heat proof bowl with a slotted spoon.
Working in batches scatter some beef in the hot oil. Don't crowd the pan. Putting less meat in will let it brown faster. It usually takes me 3 batches to brown up one pound of meat. Cook without stirring for at least 3 minutes. Turn over a piece and see if it's browned, if it is, stir them all to brown the other side. When both sides are browned, remove with slotted spoon to the paper towel lined bowl. Add more oil to the pan if needed and brown up all the beef.
After all the beef is browned, if there are any burnt patches are on the bottom of the pan, scrape them off and throw away or your gravy will taste burnt. Add water to the pan and stir to scrape up all that browned goodness. (The French call it fond, Emeril calls it The Love). Remove the paper towel from the bowl and discard. Add that browned lovely liquid to the beef in the bowl. It may have thickened a bit from the flour left in the pan, and that's ok.
At this point, you can cover and refrigerate the beef for later use.
The next morning:
Spray your crockpot with nonstick. Combine all ingredients right in the crockpot. Cover and cook on low 8 hours.
JUST BEFORE serving, quickly stir in the dairy. Don't cook it or the dairy may curdle.
Serve over hot cooked noodles.
Monday, May 2, 2011
Holiday Leftovers: Ham
| Scalloped Potatoes and Ham |
I used the leftover slices to make Scalloped Potatoes and Ham. This is pure comfort food. Recipes like this have been around for generations. My grandmother made a heavenly one: tender potatoes, salty ham, thick creamy sauce and onions just starting to turn sweet. My mother used to sprinkle flour over layers of potatoes, onions and ham, pour milk over it, put it in the oven and hope for the best. Usually it turned out runny and curdled looking - it wasn't very good.
I spent years pouring through old cookbooks looking for a recipe that would produce my grandma's masterpiece. The old cookbooks told me to do what my mother had done - not good enough. Some later recipes called for using a can of cream of mushroom soup instead of milk and flour. Creamy results, but the flavors were just wrong! Other recipes advocated boxed scalloped potato mixes and ham. I tried it. yuck.
So, I thought I'd just make a cream sauce like you'd make for macaroni and cheese but without the cheese and stir that into the potatoes. Yes siree, Bob! That's what I'm talking about! Tastes like grandma's.
The best part is the browned crusty bits around the edges...
Scalloped Potatoes and Ham
1 onion, sliced thinly into half moons
4 cups potatoes, peeled and thinly sliced
3 cups ham, diced
1/2 cup butter
1/2 cup flour
1/2 tsp. ground black pepper
pinch ground nutmeg
3 cups whole milk
Preheat oven to 350F.
Spray a 13x9 glass baking dish with non stick. Why glass? Gets those edges nicely crusty!
Slice potatoes and onions, put into cold water while you prepare the sauce. Why? Soaking the potatoes keeps them from turning black and soaking the onions keeps their flavor from being too strong.
Melt butter in a saucepan large enough to hold all the milk. Wait for it to stop foaming, then stir in the flour all at once. Cook, stirring constantly, 1 minute. Why? If you don't cook the flour, your sauce will taste like raw flour even after baking.
Add the milk, pepper and nutmeg and stir constantly until it thickens and boils. It will get very thick. That's ok, because the liquid coming out of the potatoes and onions as they cook will thin it out a bit in the oven.
Drain the potatoes and onions in a colander. Give it a couple shakes to remove all the excess water. Dump into a heat proof bowl large enough to hold the potatoes, onions, ham and the sauce. Add the ham. Pour the hot sauce over all. Using a large spoon, carefully fold the sauce into the meat and vegetable mixture. Try not to break any potato slices, but get everything evenly coated.
Spoon the mixture into the prepared baking dish. Cover tightly with foil and bake for 30 minutes. Uncover and bake 1 hour longer.
Serves 6 to 10.
I put the ham bone in my crockpot with an onion studded with a couple whole cloves, a large carrot, some whole peppercorns and a bay leaf. I put it on high and let it go all day; then turned it to low and let it go all night. The following day, I put the covered crock in the refrigerator to cool. I'll use the broth and meat tomorrow to make Bean Soup.
Sunday, March 27, 2011
Nachos for Dinner! AND - It's on The PLAN
![]() |
| This is ONE serving in a big shallow 8" soup bowl. |
When Walt and I were dating, we would often share a big platter of nachos for dinner. THOUSANDS OF CALORIES, way too much fat. Sadly, it had to end. We missed our indulgent appy-for-dinner.
Then, I saw this amazing recipe at HungryGirl.com which sheared off about half of the calories. Here's a link to the original recipe: Mexican Makeover which first appeared in 2006. I can't tell you how excited I was! However, over the years, because I couldn't find the ingredients in my local stores (and I'm sorry, I am NOT mail-ordering tortilla chips), I've made many, many changes to the original recipe. The end result is Yummy. Indulgent. Nachos. Tastes-like-the-Real-Thing. BUT - lower calorie and lower fat.
Now all that remains is the concept - and a very good concept it is! Basically, you substitute 99% fat-free vegetarian chili for the taco meat and make a lower calorie, way-lower fat sauce and pour them over baked tortilla chips. (Ignore the regular chips in the photo. I sent Walt to the store. This is his favorite brand, which doesn't come baked. You do it the right way and use baked chips.)
The sauce is super easy: 3 different kinds of reduced fat cheese melted in some light unsweetened, unflavored almond milk or soymilk. I prefer almond milk, because soymilk develops a toasted marshmallow flavor when heated - not so good in cheese sauce. Almost unnoticable in this sauce, but I notice. It bugs me. You could substitute cow's milk, just keep it unflavored and low-fat.
![]() |
| This is going to melt into nacho cheese sauce. |
So here's how to make 3 Huge servings:
Nacho Makeover
7 ounces (about half a bag) of baked tortilla chips
1 (15 ounce) can Hormel Vegetarian 99% Fat-Free Chili
1/2 cup unsweetened, original flavor Almond Milk
3 ounces reduced-fat shredded Cheddar Cheese
3 slices Kraft 2% Reduced Fat American Cheese
2 tablespoons neufchatel cheese (light cream cheese)
1 - 2 teaspoons Lousiana Hot Sauce, optional
3 tablespoons plain yogurt, optional
3/4 cup salsa
1 tablespoon sliced black olives, optional
few slices hot cherry peppers, optional
Place the almond milk, cheeses and hot sauce in a small saucepan. Heat, stirring constantly, over medium low heat, until all cheeses have melted and sauce is smooth. Keep warm.
Empty chili into a microwave safe container, cover loosely and heat 2 to 3 minutes on High, stirring once, or until hot.
Divide chips among 3 shallow soup bowls (or a large platter if preparing as appetizer). Spoon equal amounts of the cheese sauce, chili, salsa, yogurt, olives and peppers over the chips.
Now, I don't know the nutritionals for this recipe, but I'm pretty sure I'm far better off eating this than the calorie-laden restaurant version.
Here's how it fits into The PLAN:
2.3 ounces grains, 3.2 ounces meat, 1.25 cups milk, 1/4 cup vegetable
My total allowables for the entire day:
5.5 ounces grains, 5 ounces meat, 3 cups milk, 2.5 cups vegetables
I feel indulged, I am properly fed.
Wednesday, March 2, 2011
More PLANned Comfort Food - Crockpot Cassoulet
![]() |
| Cassoulet |
Here's how it starts:
A package of kielbasa or smoked sausage (in this case Turkey Kielbasa), some carrots, garlic, onion, beans, tomato sauce, brown sugar, thyme and red wine. To make this vegetarian, substitute another can of rinsed, drained beans for the kielbasa.
The red wine is French genius at work. Somehow, a little bit of red wine transformes "very good" into "WOW". I am assured that the alcohol cooks out, so it's safe for the kids. The wine needn't be expensive - I used Winking Owl, which I think I bought at Aldi for under $5.00. Three Buck Chuck works, too. Just make sure it's something you'll want to drink, because you'll want a glass with dinner, and cooking with wine won't make the wine better. However, if you don't drink or if you have a red wine sensivity, use an equal amount of broth. I haven't tried it with vegetable broth, so you're on your own there.
This isn't my recipe. Like most of my really good recipes, I found it. Taste of Home Contest Winning are great cookbooks. This is from 2004, which is the TOH cookbook I reach for most often. I did, however, adapt it to the crockpot.
French Country Casserole
1 lb. kielbasa or smoked sausage, cut diagonally into 1/4" slices
4 carrots, sliced into 1/4" coins
1 medium onion, peeled, halved and sliced into 1/4" half moons
3 (15 - 16 ounce each) cans beans, 1 each kidney, cannelini, and black, rinsed and drained
2 (8 ounce) cans plain tomato sauce
1/2 cup red wine or beef broth or vegetable broth
2 level tablespoons light brown sugar, NOT packed (if you must pack, only use 1)
2 cloves garlic, minced
1 1/2 teaspoons dried thyme, crumbled
Spray the interior of your crockpot with non-stick. Add all ingredients and mix well.
Slow cook on Low 8 - 10 hours, depending on how crunchy you want your carrots.
10 servings, 241 calories per 1 cup
PLAN numbers: 6 1/5 ounces meat, 1/2 cup vegetables
Friday, February 11, 2011
PLANned Comfort Food
Kielbasa and Peppers
This is one of those recipes that really doesn't have measurements. You chop and drop the ingredients into the pan as they're chopped, then simmer until done. In the summer I'll use whatever is ripe in the garden - fresh tomatoes, eggplant, zucchini, yellow squash, fresh tyhme or basil. Sometimes, I'll add a can of tomato sauce to thicken up the pan sauce.
Numbers according to The Plan: 1 serving = 2.7 ounces meat and 1 1/4 cups vegetables; 1/2 cup risotto = 4 ounces grain.
Kielbasa and Peppers
1 lb. Turkey kielbasa, cut into 1/2" diagonal slices
2-3 onions, peeled and cut in 1/2" chunks
1 rib celery, diagonally sliced
1 bell pepper, seeded and cut into 1" chunks
2-3 cloves garlic, minced
1/2 tsp. thyme
2 pints (or 14 ounce cans) diced tomatoes (not petite diced)
Coat your largest non-stick skillet (or Dutch oven) with Pam. Put it over high heat and let it get really hot while you slice the kielbasa. Dump it into the pan.
Peel and chunk the onions. Dump them into the pan. Stir. The kielbasa may look a little charred. This is good.
Seed and chunk the pepper. Dump it into the pan. Stir. Charring on onions is good.
Peel and mince the garlic. Scatter it into the pan. Stir. Charring on peppers is good.
Let cook, stirring occasionally until peppers are a bit charred on the edges and onion is almost translucent.
Add tomatoes with their juice. Stir.
Sprinkle the thyme into the pan. Stir.
Bring to a boil then reduce heat to medium. Allow to simmer until most of the liquid has evaporated. You'll have a nice bit of sauce in the bottom of the pan. Taste and add salt or pepper if needed.
Serves 6
Serve over polenta OR hot buttered wide noodles or alongside potatoes.
This meal we had browned onion risotto with it.
What's cooking in your kitchen?
This is one of those recipes that really doesn't have measurements. You chop and drop the ingredients into the pan as they're chopped, then simmer until done. In the summer I'll use whatever is ripe in the garden - fresh tomatoes, eggplant, zucchini, yellow squash, fresh tyhme or basil. Sometimes, I'll add a can of tomato sauce to thicken up the pan sauce.
Numbers according to The Plan: 1 serving = 2.7 ounces meat and 1 1/4 cups vegetables; 1/2 cup risotto = 4 ounces grain.
Kielbasa and Peppers
1 lb. Turkey kielbasa, cut into 1/2" diagonal slices
2-3 onions, peeled and cut in 1/2" chunks
1 rib celery, diagonally sliced
1 bell pepper, seeded and cut into 1" chunks
2-3 cloves garlic, minced
1/2 tsp. thyme
2 pints (or 14 ounce cans) diced tomatoes (not petite diced)
Coat your largest non-stick skillet (or Dutch oven) with Pam. Put it over high heat and let it get really hot while you slice the kielbasa. Dump it into the pan.
Peel and chunk the onions. Dump them into the pan. Stir. The kielbasa may look a little charred. This is good.
Seed and chunk the pepper. Dump it into the pan. Stir. Charring on onions is good.
Peel and mince the garlic. Scatter it into the pan. Stir. Charring on peppers is good.
Let cook, stirring occasionally until peppers are a bit charred on the edges and onion is almost translucent.
Add tomatoes with their juice. Stir.
Sprinkle the thyme into the pan. Stir.
Bring to a boil then reduce heat to medium. Allow to simmer until most of the liquid has evaporated. You'll have a nice bit of sauce in the bottom of the pan. Taste and add salt or pepper if needed.
Serves 6
Serve over polenta OR hot buttered wide noodles or alongside potatoes.
This meal we had browned onion risotto with it.
What's cooking in your kitchen?
Friday, February 4, 2011
PLANned Celebration - Chinese New Year
![]() |
| Kung Pao Chicken over Fried Rice |
![]() |
| Ingredients |
I recommend using a high sided pan to catch spatters. I like using my dutch oven because it's non-stick. I had a wok for a long time and just didn't use it. I kept reaching for my dutch oven, so I gave the wok away and haven't missed it.
![]() |
| Homemade Fried Rice |
Kung Pao Chicken
Very loosely adapted from Hungry Girl
4 servings
Counts for The Plan: 3.5 oz meat, 1 1/3 cup veg., ½ cup fruit, 1 teaspoon oil per serving
12 oz. raw boneless skinless lean chicken breast
2 tablespoons cornstarch
1 Tablespoon canola oil
1 (16 oz.) package frozen stir-fry vegetables
2 Tablespoons water
2 tablespoons dry-roasted unsalted peanuts
Sauce:
2 tablespoons + ¼ cup cold water
1 tablespoon cornstarch
4 tablespoons reduced-sodium/light soy sauce
3 tablespoons seasoned rice vinegar
1 clove minced garlic (1 tsp.)
¼ cup Sweet Thai Chili Sauce
1. Cut chicken into ½” cubes. Place in bowl and toss with 2 tablespoons cornstarch; set aside. Bring a Dutch oven or wok to medium-high heat. Add 1 tablespoon oil; when it shimmers, add chicken, and brown on all sides.
2. While chicken browns, make the sauce in the same bowl that had the chicken in it. Combine 2 tablespoons cold water with 1 tablespoon cornstarch until smooth; then add ¼ cup water, soy sauce, vinegar, minced garlic and chili sauce. Stir until all ingredients have dissolved. Set sauce aside.
Serve with Fried Rice or steamed rice (½ cup cooked rice = 3.5 grain).
Fried Rice
4 servings
1 cup fried rice = 3.5 oz. grain, ½ cup veg., 1/2 oz. meat
2 cups leftover cooked rice, cold
3 scallions, sliced, greens and whites separate
¼ teaspoon sesame oil
2 tablespoons reduced sodium soy sauce
Pinch 5 spice powder, optional
1 egg
1 cup frozen peas, thawed
Heat large skillet, when hot, spray with non-stick; add the carrot and stir fry 30 seconds. Add rice and white part of scallions, stir fry 2 minutes. Combine sesame oil, soy sauce and 5 spice, sprinkle over rice mixture in skillet. Stir to combine. Push to side of pan. Add egg and scramble. Stir into rice mixture. Add peas; stir into rice. Garnish with green parts of scallions.
3. Stir chicken, add vegetables and 2 tbsp. of water; cover and allow to steam 1 minute. Remove cover and stirring occasionally, cook until water evaporates. Add peanuts. Raise heat to high, stir sauce to get cornstarch off of bottom of bowl, and add to the pan. Stir to coat all ingredients in sauce. Cook and stir until sauce boils and thickens.
Monday, January 31, 2011
PLANned Leftovers: Pork Roast Meal 3 - Pork Paprikash
![]() |
| I had mine without added sour cream. |
Remember the pork roast I brined and roasted last week? I told you I had plans for the leftovers. The second meal was pulled pork sandwiches which was a great success. Meal three was tonight: Pork with Paprika, Mushrooms and Sour Cream. I found it at http://www.kalynskitchen.com/. She's very creative. I always enjoy her recipes. This one is South Beach friendly, which is very close to what I'm trying to accomplish on The Plan. Her site has one of the most extensive and diverse collections of South Beach recipes I've ever seen. Highly recommended. By me. Enough said.
Speaking of The Plan, 1 serving (1/4th) of this recipe, with a minor alteration (after trimming, I had 14 ounces of meat, rather than 16 ounces called for in the recipe), clocks in at:
- 3.5 ounces of meat
- 1 1/4 cups vegetables
- 2 1/4 teaspoons oil
- 1/2 cup milk (for 3 tablespoons sour cream)
- I served it over 3 ounces of cooked noodles (counted as grain).
It was delicious! I loved it. Walt, not so much. It reminded him of goulash due to the paprika. He has a thing about goulash...
...which didn't keep him from putting a serious dent in his serving before I got back with the camera. He had his with sour cream, and I wanted to show you the creaminess of the sauce.
I loved the flavor combinations; it did remind me of goulash, but the meat didn't have the succulent fall apart texture of goulash. It was firm, moist and tender, exactly as I'd hoped, knowing that one of the reasons Walt doesn't like goulash is due to the texture of the beef. It was also very, very filling and rich. I could only eat half of my serving - which is a very good thing. I'm full on less food. That's a double win for me.
I still have one more pound of roast pork to use up. Any suggestions?
Thursday, January 27, 2011
PLANned Leftovers - Pork Roast Take 2
![]() |
| Pulled Pork Sandwiches |
Walt was rather surprised when I made a 3 lb. roast for just the two of us. I had plans for that roast. Here is dinner number two. I wanted to make pulled pork, but I wanted it to fit into several requirements:
- moist, fall-apart tender meat
- filling & satisfying
- well balanced flavors
- fit into The Plan - these sandwiches clock in nicely at 4 ounces meat, 4 ounces grain (buns), 1/3 cups vegetables (V8 ), 1/4 cup fruit (BBQ sauce) per 2 sandwich serving
I wanted to use my crock pot to make the meat fall-apart-tender and moist. But, barbeque sauce will get gluey and burn in extended cooking. My solution - braise the meat in V8 Juice and add the barbeque sauce at the very end. It worked perfectly. The moist cooking made for moist meat.
I wasn't sure about this idea, so I only made enough for one meal. We were both sad that it was gone. I'll be making it again SOON. Here's what I did:
Pulled Pork from Leftover Roast
8 ounces leftover sliced pork loin roast (about 4 slices)
1 (6 ounce) can Spicy V8 Juice
1/2 cup Sweet Baby Ray's Original Barbeque Sauce
4 (2 ounces each) hamburger buns, 80 calorie or less, such as Healthy Choice brand
Spray the inside of a small crockpot with non-stick.
Pour in the V8 Juice. Add the pork slices. Turn them to coat with V8. You should have a couple overlapping layers of pork. If you don't, increase the quantities so it doesn't burn*.
Cook on high 3 hours, or on low 5 hours.
Using a potato masher or 2 forks, shred the meat.
Add barbeque sauce; stir to combine. Recover and allow sauce to heat, about 5 minutes while you toast the buns. Stir again and serve over toasted buns.
This recipe is so simple that you can double or triple it easily. *Be careful about the ratio of meat and V8 Juice to the size of your crock pot. If you have a large crockpot, you'll want to increase the quantities of everything. You could also put the ingredients into a smaller heatproof container, cover it with foil and set that inside your crockpot. I've never used that method - so I can't comment on how well that works.
We used up the leftover roasted root vegetables as our veggie side. Next time I'll make my Almost Fat-Free Asian Coleslaw improved version:
Almost Fat-Free Asian Coleslaw
1/2 cup white corn syrup
1/4 cup orange juice
1 teaspoon toasted sesame oil (from the Asian foods aisle)
2 teaspoons low sodium soy sauce
1/4 cup seasoned rice vinegar OR apple cider vinegar
1 pinch ground cayenne pepper
1 (16 ounce) bag coleslaw mix, shredded style
1 teaspoon toasted sesame seeds
2 scallions, sliced diagonally
Combine the first 6 ingredients. Add the cole slaw mix. Stir and let sit 30 - 60 minutes. Stir in sesame seeds and scallions just before serving. 4 servings, about 165 calories each
Subscribe to:
Posts (Atom)