Showing posts with label baking. Show all posts

Monday, May 13, 2013

Gluten-Free Flatbread


Walt and I are trying to stay gluten-free.  Umm - I am trying to stay gluten-free and Walt is along for the ride because I'm the cook.  We are following South Beach Diet.  I noticed that I lost weight rapidly in the first phase, which eliminates all breads and starches, but started gaining when South Beach told us to start adding whole grain.  I also felt and looked bloated.  Lightbulb moment. "I think I may be sensitive to gluten".  However, some things just can't be eaten without some facsimile of bread.  Like Pulled Pork.  I was able to devise a sugar-free barbeque sauce, but you have to have it on a bun/bread/pita. 

Pinterest to the rescue.  I found this flatbread recipe Gluten-Free Flatbread.  It called for Gluten Free All Purpose Flour.  Every brand in the stores contain sugar.  Back to Pinterest.  I found this gluten-free flourmix.  It's good, but the coconut flour gives it a slightly coconutty flavor that doesn't work with Pulled Pork.  So I tried again and subbed Almond Meal for my Pulled Pork leftovers.  I'll be trying another version of gluten-free flour blend using garbanzo bean flour soon. Then I'll have an assortment of blends and will be able to pick the blend for the recipe.  The coconut flour version is perfect for sweets.

In using and revising this recipe, I found that 2 large eggs works better than the extra large egg plus egg white called for, and that almond meal is not as thirsty as coconut flour, so I had to decrease the liquid.  I also had best results using the convection feature on my oven. I tried baking one cookie sheet lined with a Silpat and the second on parchment paper. Using a Silpat caused the flatbread to be soggy in the middle.   Here's my current adaptation:

Gluten-Free Flatbread
2 cups Gluten Free Flour Blend (see below)
1 1/2 teaspoons baking powder
1 teaspoon salt
1 tablespoon olive oil
2 large eggs
1/4 cup unflavored, unsweetened milk (cow, almond, soy)
1/4 cup water

Place oven racks and 2 lowest positions. Preheat oven to 425F and use convection if available.
Combine dry ingredients.
Add oil, eggs and milk.
Slowly add warm water.  You want a soft, wet dough.
Use an ice cream scoop to portion out 6 scoops onto 2 parchment lined cookie sheets.
Use wet fingers to smooth each into thin 5" circles.
Bake 8 minutes for convection/10 minutes regular oven.
Remove from oven and flip each using a pancake turner.
Return to oven with the pan that was on the upper rack in the lower position.
Bake 8 minutes longer.
Remove to wire rack to cool.
Store at room temperature in a zip top bag.

These are flexible; you can hold the sandwiches like a taco. They are also very filling.

Gluten-Free Flour Blend
1 cup brown rice flour
1 cup GF certified oat flour
1 cup almond flour/meal
1 cup tapioca flour
1/4 cup cornstarch
1 tablespoon + 1/2 teaspoon xanthan gum

Combine in a zip top bag.


Wednesday, April 11, 2012

New Favorite Bread Machine Recipe

This recipe makes 2 loaves of a moist, richly flavored, very high rising bread with a soft texture.  I adapted a recipe found at food.com to better fit my tastes (read that as richer and moister).  The recipe calls it Challah.  Trust me - it's not challah.  But it has a very pleasant faintly eggy flavor.

I like to prepare the dough in my bread machine, then form it into loaves, let it rise again and bake it in the oven.  This recipe originally called for it to be baked in the machine, thereby making one large loaf.  I found that it overflowed the pan when baked in the bread machine.  I solved that by forming into 2 loaves and baking in my oven.  I also like the texture and flavor better.  I think that bread baked in the bread machine has a slight steamed flavor.  It may just be my machine, or it may just be me.  Try it either way.

Bread Machine Challah
3/4 cup warm water
1 egg, at room temperature
2 egg yolks, at room temperature
3 tablespoons butter, cut into pats
3 cups bread flour
1/4 cup sugar
1 1/4 teaspoons salt
2 teaspoons bread machine yeast

Add ingredients to your bread machine in order suggested by the manufacturer.  If you can't find them, place wet ingredients in machine: water, egg, egg yolks and butter.
In a bowl, combine dry ingredients: flour, sugar, salt and yeast.  Stir to combine.
Add to machine on top of wet ingredients; don't stir.  Set the machine to dough cycle, 2 lb. loaf and start the machine.
Peek inside to be sure the blade is moving the ingredients about.  Set a timer for 5 minutes.
When the timer goes off, use a spatula to scrape in any flour that isn't mixed into the dough.  It will not look like dough.  It should look too wet, but not soupy. If it looks soupy, add up to 2 tablespoons additional flour. If the dough looks a little dry (very firm ball of dough wrapped around the dough blade) add additional water - up to 2 tablespoons.
Don't agonize over it, neither will kill the bread.  Not enough flour and the bread will be flat and dense.  Too much flour and it will be dry and tough.  Either way it's edible.  Remember that's what bread pudding, bread crumbs and french toast are for.  Keep making bread and within 3 or 4 runs you will figure out how it's supposed to look when it first is mixed.  Then it's easy-peasy from then on out.
It should take somewhere around and hour and 30 minutes to 2 hours before the dough is ready - so take note of when you need to be home and be SURE to be there.
Spray 2 loaf pans with cooking oil. Spray 2 pieces of plastic wrap with oil and set aside.
When the machine sounds it's end of cycle beep, beep, beep - flour your clean dry counter top and dump out the dough.  Fish out the paddle and put it aside to wash.  Remove your rings to a safe place and flour your hands.  Pat out air bubbles in the dough. and form it into a flat rough rectangle.  Being mindful of your counter top, cut the dough into two equal pieces.  Roll one piece like a jelly roll starting at a short side.  Pinch the ends and tuck them under; place seam side down in pan.  Repeat with the other piece of dough.
Cover each pan with a piece of prepared plastic wrap and set in warm spot to rise.  Allow to rise until it is about 1" above the top of the pan, about 45 minutes.  After 30 minutes, start preheating your oven to 350F, so it's ready when the dough is ready.
Remove plastic wrap and place into preheated oven.  Bake 30 - 40 minutes or until tops are browned and loaves sound hollow when you knock on them.
Turn out onto a wire rack and allow to come to room temperature before slicing.  I slice one loaf and place it into a gallon size zip top bag and store it at room temperature.  The second loaf is also cooled to room temperature, then placed, unsliced in a zip top bag and frozen until needed.


Saturday, November 19, 2011

Happy Birthday Nick!

Today is Nick's 85th birthday.  I baked a bundt cake for him and put a simple glaze on it.  If you've been reading my blog for very long, you'll remember that bundt cakes and I have a love/hate relationship.  I love bundt cakes, they hate to leave the pan.  Their reluctance to leave their pan has resulted in mayhem like this:

which necessitated last minute creativeness like this Trifle:
It was truly yummy, but I don't need a repeat.  That NONSTICK pan was oiled and floured and still - disaster resulted.  All because bundt cakes like to stay in the pan.  I had to devise a way to form a crust that would  s-l-i-d-e  out of the pan.  And patience.  I need to let it cool down.

So here's my Super Duper Bundt Pan Solution:  equal parts all purpose flour and vegetable oil.  Just stir them together and paint the inside of your bundt pan with a pastry brush.  (Be sure to smell the pastry brush to avoid the garlic bread pastry brush).  Add your batter, bake until done.  ALLOW TO COOL at least 40 minutes on a rack before unpanning. The caps are for my benefit.  I'm sure you'll be patient and let it cool without needing such a stern reminder. 

Let it cool to room temperature on a wire rack, then make the glaze:

Cake Glaze
2 cups confectioner's/powdered/10X sugar
2 Tablespoons white corn syrup (clear Karo)
2 Tablespoons hot tap water
1/2 teaspoon your choice extract (almond, lemon, orange, vanilla, mint)

Place sugar, syrup and water in a large microwaveable bowl.  Stir to moisten.  It will be clumpy. Microwave 30 seconds on high.  Stir and scrape down the bowl.  Microwave 15 seconds on high, stir.  Repeat until it becomes smooth and pourable, about the consistency of pancake batter.  Don't let it boil.  Stir in the extract.  If you're using lemon or orange extract, adding 1/2 teaspoon lemon or orange rind (or both!) is very good, but I wouldn't use it with other extracts.
Place the cake, still on the cooling rack, over a plate to catch drips and spoon the glaze over the cake, spreading it with the back of the spoon to cover as much or as little as you like.  Let it set up at least 15 minutes before moving to your serving plate.

This glaze sets up with a shiny, dry finish.  The underneath stays soft; almost fudgy in consistency.


Nick and Anna. Two of my very favorite people.


Tuesday, June 28, 2011

Epic Fail Trifle - Making Something Wonderful Out of an Uh-Oh

Unbeknownst to her, Julia Child was my childhood mentor.  I spent hours watching her cook in grainy black and white while all the other children were playing outside after school.  I admired her aplomb, when after dropping a steak on the floor, she blithely picked it up, rinsed it off and proceeded to finish the dish.

See that photo above?  Epic failure.  It started with a great idea.  Mix up a chocolate fudge bundt cake, add a can of raspberry pastry filling then pop it in the oven.  Later, people would swoon as they tasted the raspberry filling in the moist, chocolatey decadance of the cake.

Reality intervened when I turned said cake out of the pan while it was still a trifle too warm.  It tore at it's weakest part, that lovely filling.  Which now looks rather gruesome.  What to do?


Could I somehow scrape out the top and plop it on top?  Yeah, that would be appetizing.  Did I mention that I was baking the bundt cake for a couples Bible study dinner? Humiliation before 10 couples was imminent. I was out of eggs and running out of time. What would Julia do?

I made a trifle.  If you have never had a trifle, you must, must ruin a cake and make one.  It is truly decadent.  You take cake, chop it up and layer it in a clear bowl, with whipped cream mixed with pudding, and fruit or jam (or pastry filling).  Top it with more whipped cream and serve it by the spoonful.

This doesn't have it's final layer of snowy white whipped cream.
A quick search of coupons for ready-to-eat pudding and whipping cream, then off to the store.  I scooped the pudding into a bowl.  Whipped the cream and folded the pudding into two thirds of it.  Then made layers of chopped/torn cake and pudding/whipped cream in my clear bowl, covered it with plastic wrap and chilled it until it was time to leave.   I brought the rest of the whipped cream along and topped the trifle just before serving.  It looked pretty, tasted divine and disappeared fast.

Epic Fail Trifle
1 box chocolate fudge cake mix (2 layer size)
eggs, oil and water called for on mix
1 (7 - 10 ounce) can raspberry pastry filling (not pie filling)
2 packages pudding (each with 6 individual serving cups)
1 pint whipping cream
1/4 cup white sugar

Preheat the oven, prepare and bake the cake mix as directed on the package for a bundt cake, except add the pastry filling in spoonfuls on top of the batter.  Be careful to avoid sides or center post of pan.  The pastry filling will sink while the cake bakes, forming a ring of filling.
Bake 55 - 60 minutes, or until cake tests done.
Place on wire rack to cool at least 20 minutes.  NOTE: This resulted in my cake fracturing.  It may or may not for you, but since you're going to tear apart the cake anyway, it doesn't matter.
Run a thin bladed knife between the cake and pan, both the outside edge and the post.
Take a deep breath, place a cooling rack over the pan and flip it over.  It should plop out.  If it doesn't, give the rack and couple sharp whacks on the counter to dislodge it.
If your cake fractured and you have partial unmolding - good for you, less to chop.
Allow the cake to cool to room temperature.
Whip the cream, adding only enough sugar to sweeten it slightly.
Scoop the pudding cups into a large bowl.  Fold two thirds of the whipped cream into it.  Cover and refrigerate the remaining whipped cream.
Chop up or tear the cake into bite sized pieces. 
Put one third of the cake pieces into the bowl.  Spoon one third of the pudding mixture on top and spread.  Repeat until all is used up, ending with pudding mixture.
Cover the bowl with plastic wrap and chill at least 2 hours.
When ready to serve, top with remaining whipped cream and spoon into bowls. 
Be ready for silence as people mmm and yum themselves through their serving.  Smile understandingly as they ask for "just a tad more".

Monday, January 24, 2011

Ugly Apple Cake with Butter Sauce

This is, hands down, my most requested dessert. I found this recipe in Taste of Home Contest Winning Recipes 2004 and I've been making it since early 2005 when I acquired the cookbook.  I call it Ugly Apple Cake, because everytime I take it out of the oven I say to myself  "That is one ugly cake."  Don't judge the cake by how it looks.  This is moist, rich with apples, nuts and spices and not too sweet.


I made this cake last Wednesday for my Couples' Bible Study Group.  The other night, after a wonderful pork roast dinner, I was wishing we still had Apple Cake in the house. What goes better with pork than apples? Somehow jello with dried fruit wasn't quite special enough.  So, plan on making the apple cake along with the pork roast.  You won't be disappointed.
 
 
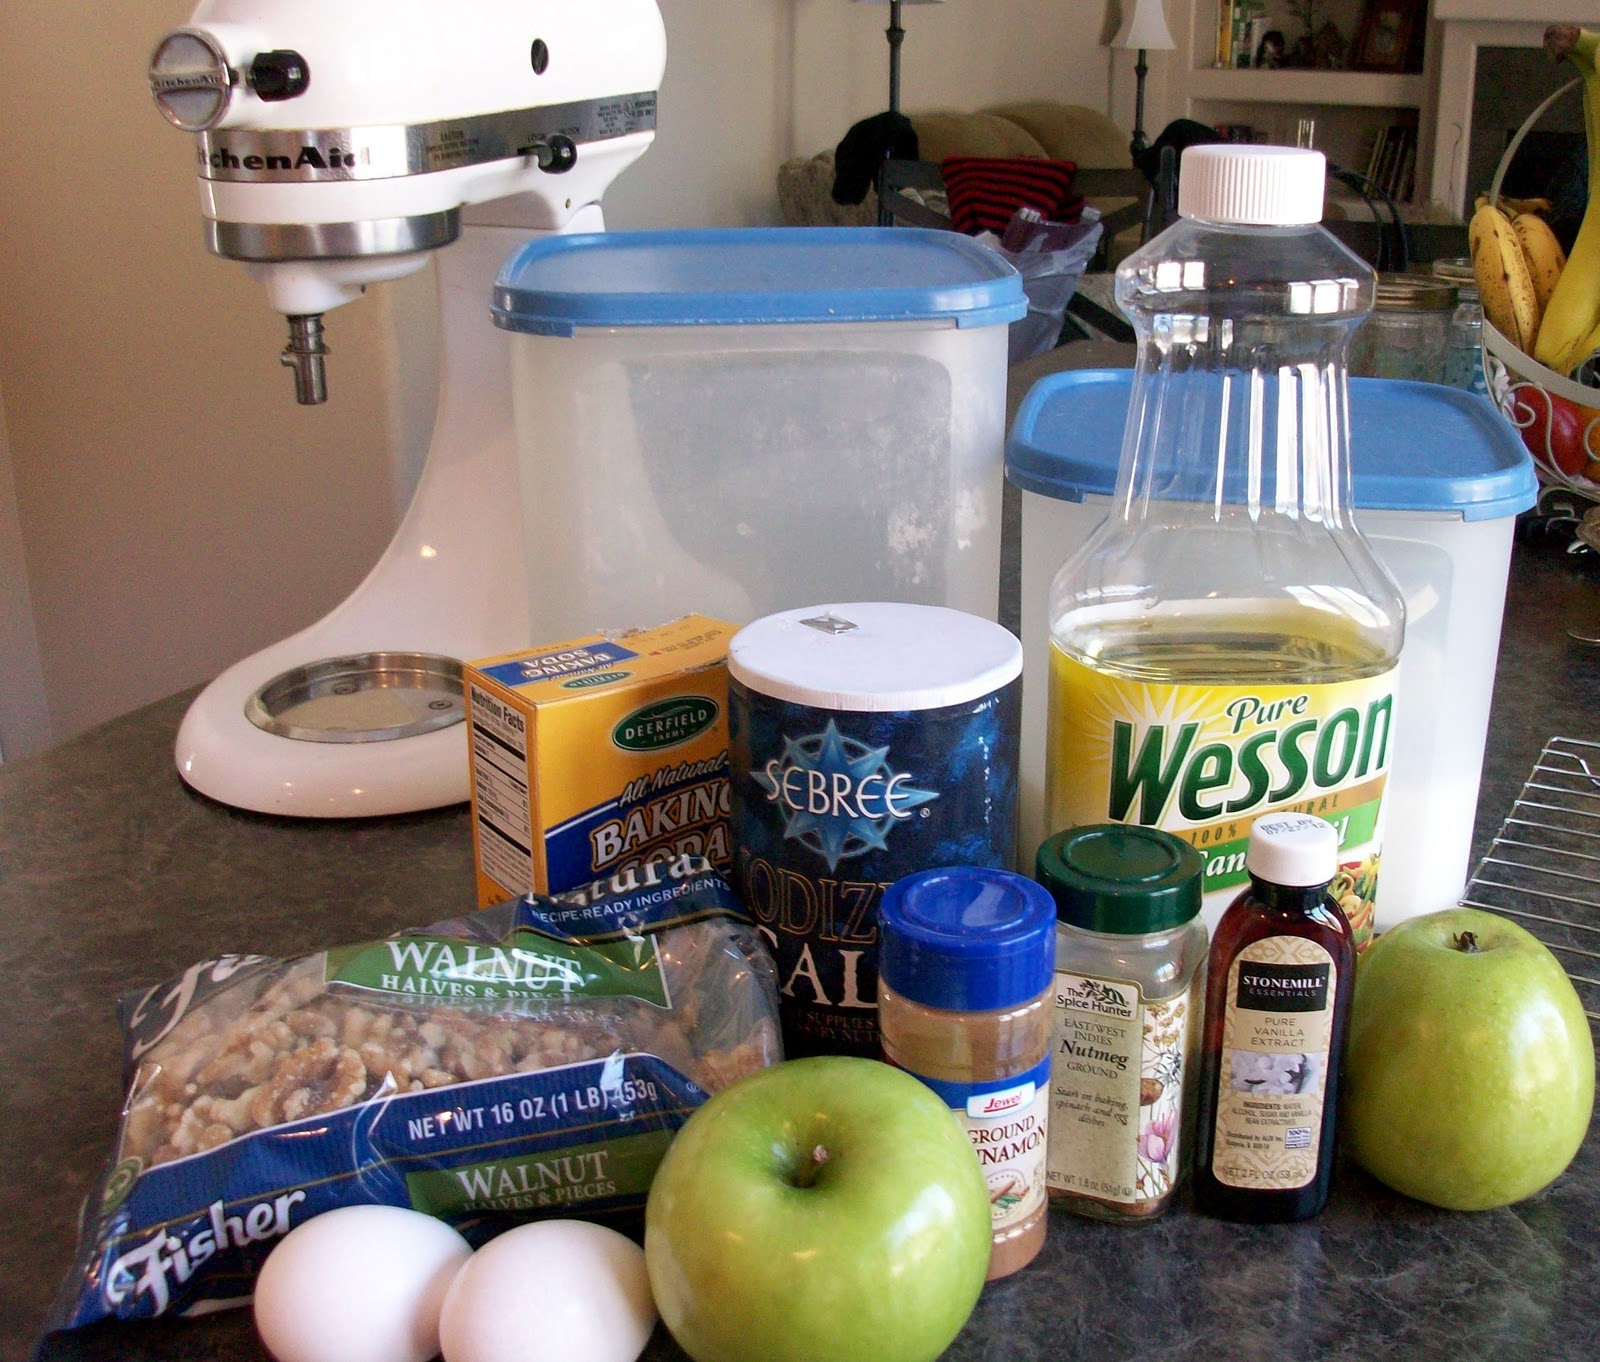
The ingredients.  Really, that's it.  You probably have everything in your kitchen, except maybe Granny Smith apples.  Go buy apples.


Peel, core and cut your apples into 1/2" chunks.  I bought 5, used 3.  I always buy too many.  There's an apple crisp in our near future.

Walnut Apple Cake

2 eggs
2 cups sugar
½ cup canola oil
2 tsp. vanilla extract
2 cups all-purpose flour
2 ½ tsp. cinnamon
2 tsp. baking soda
1 tsp. salt
¼ tsp. nutmeg
4 cups peeled tart apples, chopped
1 cup walnuts, chopped

Butter Sauce:
¾ cup sugar
tiny pinch salt, optional*
3 tbls. flour
1 cup milk
2 tbls. Butter
1 tsp. vanilla extract

Preheat oven to 350F. Spray a 13x9 metal pan with oil and flour spray or grease well with Crisco; set aside.

In a large mixing bowl, combine eggs, sugar, oil and vanilla; mix well. Combine dry ingredients; add to egg mixture and mix well (batter will be stiff). Mix in apples and walnuts on very low speed.

Spread mixture evenly in the baking pan. Bake 55 minutes to 1 hour, or until a toothpick inserted near the center comes out clean. Cool on rack.

Make the sauce:
Combine sugar, salt and flour in saucepan; gradually stir in milk. Add butter; bring to a boil over medium heat. Boil, stirring constantly for 2 minutes. Remove from heat, stir in vanilla. Allow to cool to warm before serving.  Refrigerate leftover sauce, rewarm briefly in microwave.

Cut cooled cake into squares, top with warm sauce.
12 – 15 servings

*there wasn't any salt in the original recipe for the sauce, it tastes a little flat without it.
 

Monday, November 8, 2010

Crockpot Oatmeal & Oatmeal Muffins

My women's Bible study meets Wednesday mornings.  We all take turns bringing breakfasty treats.  Last week was my turn.  We had enjoyed a unusually warm early autumn until then, but Tuesday was looking and feeling like autumn.  It was briskly cool and windy, with low skies full of dark puffy clouds, hinting at the possibility of cold, soaking rain. All of which put me in the mood for oatmeal.

I've heard friends talk lovingly of crockpot oatmeal, but had never sampled it.  The recipe wasn't on the back of the oatmeal canister, so I hit the internet and found several.  None of them was quite right for what I wanted - basic creamy oatmeal.  I read the reviews of each, picked the most likely candidate and made it mine.  Here's the recipe I started with:  Crock Pot Fruited Oatmeal and this is what I did:

Basic Creamy Crockpot Oatmeal
Day 1 (the night before serving)
2 cups 1% milk
1/2 cup water
1 tablespoon butter
1/8 teaspoon salt
1/2 teaspoon cinnamon
1/4 cup brown sugar
1 cup steel cut oats
Day 2
1/2 to 1 cup milk
1/4 to 1 cup water
1 cup chopped apples
1/2 cup raisins
1/2 cup chopped walnuts

Spray the inside of the crock very well with nonstick.  Add all Day 1 ingredients, stir.  Cover. 
Use the delay feature on your crockpot and set it to cook on low for 6 hours, to be ready in the morning.  I don't have a delay feature, so I plugged my crockpot into a timer (the kind you use for holiday lights).
The next morning, stir in the Day 2 ingredients.  Use a much or as little as you like. Don't worry if you have a brown crust coating the inside of your crockpot.  It's not burnt.  Scrape a bit off and taste it to reassure yourself that it doesn't taste burnt.  Then scrape it down and stir it into the oatmeal.  It gives a nice toasted "oatmeal cookie" flavor.
Makes 5-6 1 cup servings.

I made a double batch, because my Bible study group has 12 members.  Unfortunately, only half of them attended last week.  I had 5 cups of leftover oatmeal.  BUT, I have a really great muffin recipe.

Oatmeal Muffins
1 cup flour
1 cup packed brown sugar
1 teaspoon baking powder
1 teaspoon baking soda
1 cup chopped walnuts OR raisins OR dates
1/2 cup canola oil
2 eggs
1 cup leftover oatmeal
1 teaspoon vanilla

Preheat oven to 350F.  Place paper liners in a 12 cup muffin tin.
In a large bowl, combine flour, brown sugar, baking powder, baking soda and nuts or raisins.  In another bowl, combine oil, eggs, oatmeal and vanilla.  Stir wet ingredients into dry ingredients just until moistened.

Fill muffin cups two thirds full.  Bake 18-22 minutes or until muffins test done with a toothpick.  Muffins will be flat on top.
Makes 12 - 13 muffins.

I made 5 dozen muffins.  I used walnuts until I ran out of nuts, then raisins until I ran out of raisins, then finished up with dates; using up the last of the eggs, brown sugar, dates and oatmeal.  These muffins freeze well, and taste fresh baked when thawed.  Walt took a dozen to work, I took a 1/2 dozen to the Extraordinary Women conference and we have 3 dozen in the freezer.  The last 1/2 dozen?  Yum.

Monday, November 1, 2010

I Love Dessert!

I'm famous for my sweet-tooth.  Chocolates are blissful.  I make my own at Christmas and I'll blog about my favorite recipes in a few weeks.  But, for everyday sweets, you can't beat sugary carbs.


 My very first successful  Cinnamon Rolls.  Found at Our Best Bites.  Soft, fluffy, moist, with cinnamony goo that stays inside the roll.  I have these filed under 'Breakfast', but they're good anytime.  Very easy to make!  Ask my daughter, I can't roll dough to save my life - except for these incredible rolls.


Ultimate Triple Berry Bars


This one is too easy.  Prepare Krusteaz Raspberry Bars according to the package, except scatter a 4 ounce package of dried mixed berries on the filling before adding the crumb topping. Allow to cool completely before cutting. Serve warmed with a scoop of ice cream.

Cake Mix Cookies
The basic recipe:
1 (18.25 oz.) boxed cake mix (any flavor)
2 large eggs
1 stick margarine, room temperature (You can use butter, but the cookies will be flatter)
1/4 cup brown sugar
1 1/2 cups assorted dry mix-ins (such as chocolate chips, nuts, raisins, dried fruit) any combination

Combine cake mix, eggs, margarine and brown sugar. Stir in remaining ingredients.   Roll level tablespoons into balls.  Place onto greased (Pam) cookie sheets 2 inches apart; flatten and even up any ragged edges with your fingers.  Bake at 350F for 11 minutes, or until cookies puff.  Cool on pan 2 minutes. Remove to wire rack to cool completely.  Store airtight between wax paper.  About 4 dozen cookies.

Mix-in Variations:
Chunky Bar Cookies 
use a chocolate fudge cake mix
1/3 cup mini chocolate chips
1/3 cup chopped dried dates
1/3 cup raisins
1/2 cup chopped walnuts

Black Forest Cookies
use a devil's food cake mix
1/2 cup chopped dried cherries
1 cup chocolate chips

Yum-Yum Cookies
use a yellow cake mix
1/2 cup cashews, salt rinsed off and dried
1 cup white chocolate chips

Chocolate-Chocolate Pudding
I don't have a photo for this, because it never occurs to me to get the camera before diving in.
Warning: You'll never be content with pudding mix again. 

2/3 cup sugar
1/4 cup unsweetened cocoa powder (preferably dutch processed)
2 tablespoons PLUS 2 teaspoons cornstarch
pinch of salt
2 cups whole milk (can use reduced fat)
~~~~~~~~
1/4 cup mini semi-sweet chocolate chips
2 teaspoons vanilla
2 tablespoons butter, room temperature

Combine sugar, cocoa, cornstarch and salt in a heavy bottomed saucepan.  Gradually whisk in half of the milk until smooth.  Whisk in remaining milk. Switch to a spoon.
Cook over medium heat, stirring constantly until pudding thickens and comes to a boil, about 6 to 8 minutes.  Watch carefully, it can scorch easily.
Boil one minute longer, stirring constantly.
Remove from heat; add chocolate chips, vanilla and butter.  Stir until chips melt and pudding is smooth.
If you don't like skin on your pudding, place plastic wrap directly on the surface of the pudding.
Cool. If you pour it into serving bowls it will cool faster.  ;-)
Makes 4 servings.


Wednesday, June 23, 2010

Baking


The bread I like runs $4.00 a loaf at the grocery store.  It's much cheaper to make my own.  I found this recipe  Angel Bread at Recipezaar.com last year and have been making my own bread ever since.  Since the recipe makes 2 loaves, and my husband and I only eat one loaf a week, I often form some of the dough into hamburger buns or dinner rolls. 

The recipe uses the dough cycle of the bread machine, but you can make it in a mixer with a dough hook or knead it by hand.  I find I get the best results with a couple of tricks:
  • warming the egg (still in the shell) in hot tap water while I measure out the dry ingredients
  • combining all dry ingredients with a whisk, including the yeast, before adding it to the wet ingredients in the bread machine


  • checking the dough consistency after the machine runs for 5 minutes (this needed a couple more tablespoons of flour).
In 90 minutes, I have perfect dough ready to be formed into loaves.