Need a last minute gift? Have a microwave? With a few ingredients you may already have on hand you can make delicious candy and very happy friends.
Microwave Nut Brittle
1 cup sugar
1/2 cup light corn syrup
2 cups nuts or seeds, whichever you like/have on hand*
1 Tablespoon butter
1 teaspoon vanilla extract
1 1/2 teaspoons baking soda
Measure out the butter and vanilla, put them nearby in a small dish. Ditto for the baking soda. It must be in it's own dish. Do it now, you won't have time to be measuring at the end.
Line a jelly roll pan with a silpat or aluminum foil. If using foil, oil the foil. Place in oven set to 200F. The warm pan will help you spread the brittle later.
Have ready a cooling rack to place the hot pan on later. Also set out a heatproof mat to place the hot bowl on.
In an 8 cup microwave safe bowl, combine corn syrup and sugar until uniformly wet. Microwave on high, uncovered, for 4 minutes.
Using an oven mitt, remove from microwave and stir in nuts/seeds. Cook 3-5 minutes longer, until pale amber. Don't walk away or it will burn. I don't know how it knows you've left the room, but it knows.
Stir in butter and vanilla. Stir until butter melts. Add baking soda and stir to combine. It will foam. Immediately pour out onto the prepared pan. Using a metal or high heat proof silicone spatula, spread the candy as thinly as you like. If you like your brittle thicker leave it thicker.
Allow to cool until room temperature, at least 1 hour. Break into pieces. I find my meat mallet handy for this. Store in a cool, dry place.
Don't try to wash the bowl until it comes to room temperature. The boiling sugar is far hotter than boiling water and you may crack your bowl. Once it comes to room temp, fill it with hot water and let it soak. The sugar will dissolve and all you'll need to do is give it a quick wash.
*Cashews, peanuts, sliced almonds, sesame seeds and pumpkin seeds are all very good. Dry roasted or heavily salted nuts are not as tasty.
When I was a kid, I used to save my nickles and dimes to buy Fanny May Mint Meltaways. Do you have a chocolate loving friend? Make them Mint Meltaways.
Microwave Mint Meltaways
12 oz. bag mint chocolate chips
1 1/2 Tablespoons plain vegetable shortening (Crisco)
Place both in a microwave safe bowl. Cook on high 45 seconds, stir. Cook another 30 seconds, stir. Continue until chocolate has melted and runs off the spoon. Pour into chocolate molds. I use a dollar store plastic ice cube tray. Chill until firm; pop out of trays. Store in the fridge, take out 30 minutes before serving. Taste one, if it's too firm for your liking, melt them down with a little more shortening and re-chill.
Showing posts with label cheap. Show all posts
Showing posts with label cheap. Show all posts
Sunday, December 22, 2013


Tuesday, May 7, 2013
Couponing at CVS
I haven't written about couponing for a while because, frankly, there wasn't much to say. The deals were few and far between and mostly involved child related deals. We're empty nesters - so cereal, lunch snacks and diapers are not on my radar. I stocked up on razors, bath gel and shampoo, but there were no real deals - until this day.
I found a bunch of deals at CVS that I rolled as much as I could, and I still have $7 in CVS Extra Care Bucks to use next time.


I found a bunch of deals at CVS that I rolled as much as I could, and I still have $7 in CVS Extra Care Bucks to use next time.
 |
| Total out of pocket $13.32 (doesn't include the $7 ECB for next time, so net is $6.32 for EVERYTHING)
Here's how I did it:
First I went to my 3 favorite couponing sites. JillCataldo.com to see what she found for the week, then to CouponMom.com to see everything on sale at CVS with coupon matchups. Between those two sites, I determined what I wanted to buy. Then I went to CouponTom.com to search for any coupons they may have missed.
Then I figured out the best grouping and order to roll ECBs as much as possible. I'm a bit of a geek, so I used a spreadsheet, but you can do it on a pad of paper.
When I got to CVS, I scanned my Extra Bucks card and got coupons for $3.00 off any cosmetic purchase over $10 and $1.00 off Crest. Happy dance!
First transaction:
Dean Milk $2.99, 2 Almay eye $8.29 each, trial size shampoo $1.99
I had to throw in the shampoo to keep it from going into negative. That allowed me to use all the coupons.
Used coupons:
$10 CVS ECB from prior week, 2 Almay coupons $2.00 each, $3 off cosmetics, $ .50 off Dean milk.
Earned: $4.00 ECBs on the Almay and $1.00 ECB on the milk.
|


Total out of pocket $1.55! Happy Dance!
My second transaction was the toilet paper. A 12 pack of Angel Soft was sold out at $5.00, so I went with twelve double rolls of Quilted Northern Ultra Plush for $7.00. Used $5.00 ECBs earned from transaction 1. Had the Angel Soft been in stock it would have been Free after ECBs.


Total out of pocket $2.54
Third transaction:
2 Orbit gum $1.00 each, 1 Crest Pro White $2.99
Used coupons:
$1.00 off Crest
Earned me $2 ECBs for Crest and $1 ECB for Orbit


Total out of pocket $3.30
My final transaction:
1 Physicians Formula concealer $8.29
Used: $3 in ECBs from third transaction
Earned: $7.00 ECBs

Out of pocket $5.93 and earned ECB $7.00! They paid me to take this home!
Deals are out there, search for them. ;)
Thursday, September 20, 2012
Solving a Stinky Problem
Have you ever forgotten about that last load of laundry and opened your washer to a big stinky mess? Or for no good reason, your front loader washer stinks to the heavens? Here's how to de-stink on the cheap.
 |
| Dollar Store! |
Rewash the load, adding 1 cup each of hydrogen peroxide and rubbing alcohol to the normal amount of detergent. Use the longest cycle and warmest water appropriate for the clothes. Dry as normal.

If it's just the washer that stinks, wash a load of whites and use bleach, detergent and hot water. If still stinky, wash again adding detergent, hydrogen peroxide and rubbing alcohol.
To keep the stink away, wash at least one load of whites with bleach each week and keep the washer lid/door open slightly.
To help get white clothes white again, try soaking overnight in plain cold water. It's not an instant fix, but I see improvement with every wash. I keep a 5 gallon utility pail in my laundry room for just that purpose. The next day, dump into the washer, drain it (usually you can choose rinse and spin; my front loader automatically drains extra water before beginning the wash cycle) and then add detergent and bleach and wash in hot water. Works better for me than OxyClean. Be careful about that bucket if you have little ones!
Sunday, August 19, 2012
Gluten-Free Crock Pot Vegetarian Enchiladas AND Dessert Enchiladas
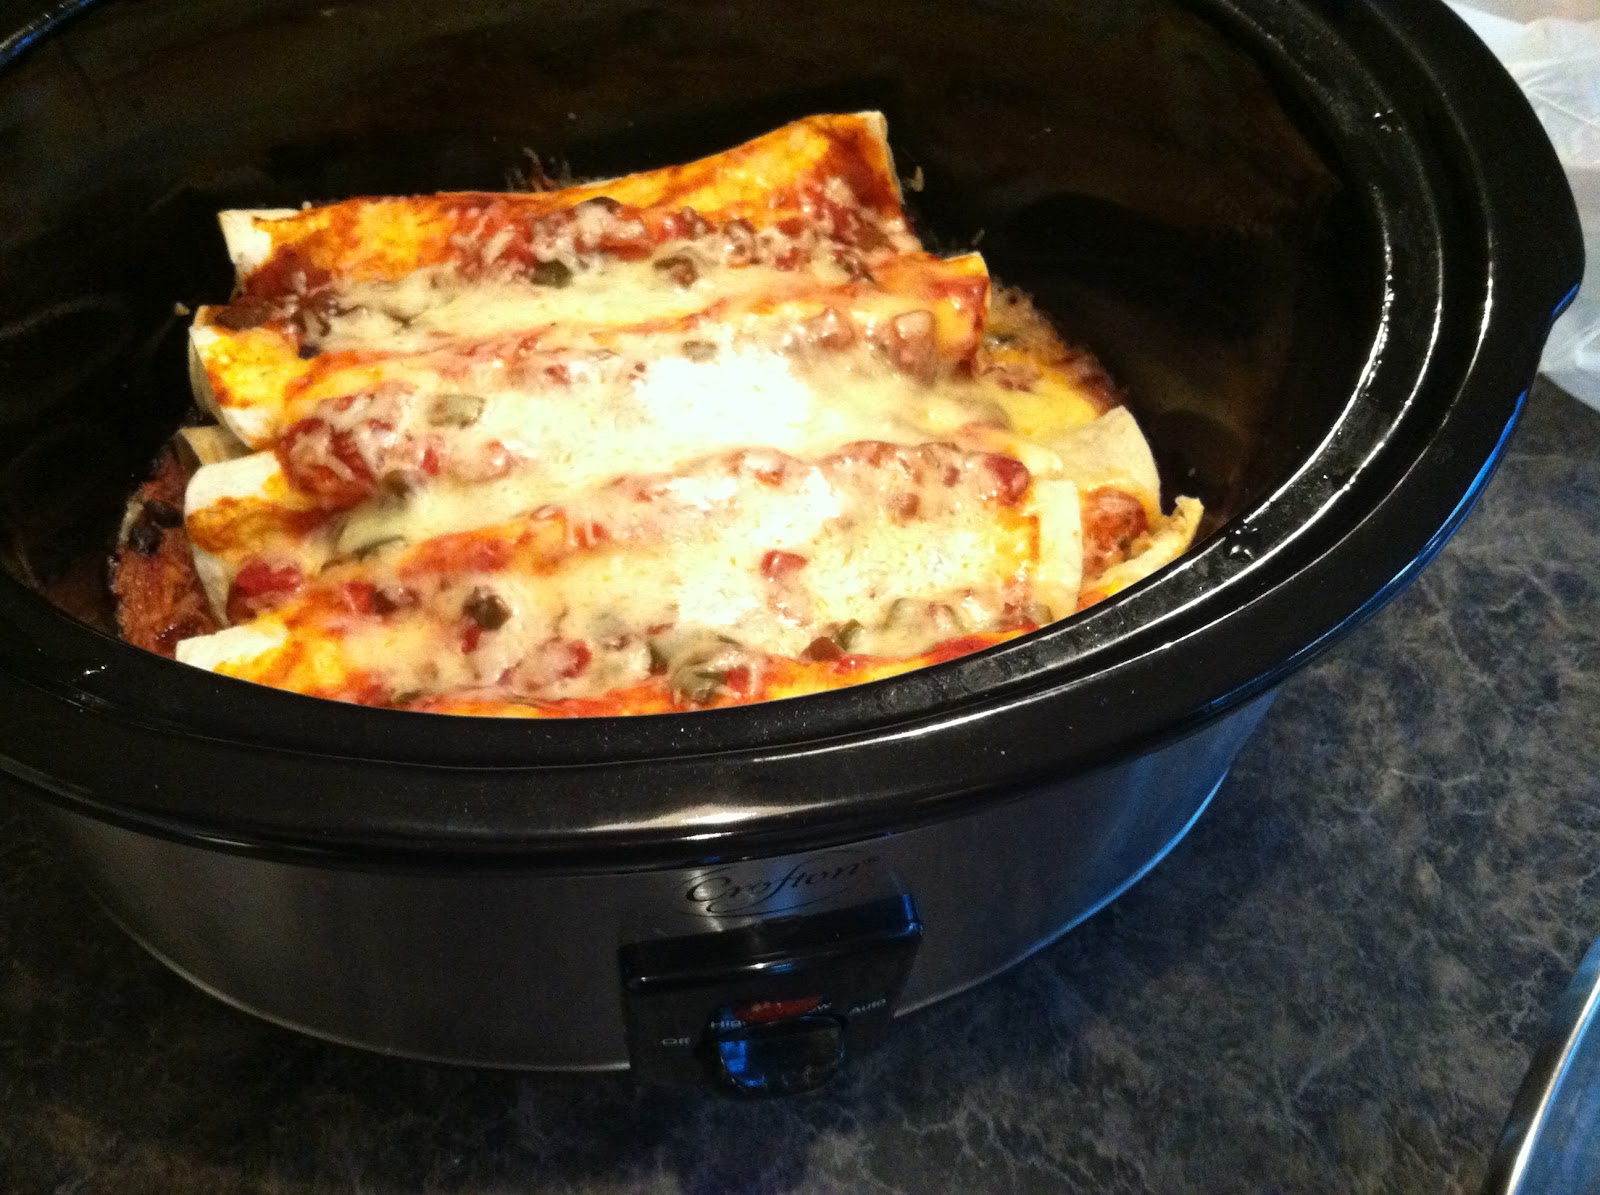 |
| Vegetarian Enchiladas |
 |
| Dessert Enchiladas |
I saw a wonderful sounding recipe for enchiladas you can make in your crock pot. It needed a little tweaking to make it work for me. Oh boy! They were delicious! My darling husband said "Mmm. Wow. Make them again." Here's what I did:

Spray the inside of your crock pot with non-stick. Pour 1 cup of chunky salsa in the crock pot. Chop some red and green sweet bell peppers and half an onion, grate 8 oz. of Monterey Jack cheese and measure out some salt, cumin and garlic powder. Rinse and drain a can of black beans and pour into a medium bowl. Add the veggies and spices and stir until combined.
Scoop 1/3 cup onto one side of a flour tortilla and add 1 tablespoon of cheese; roll up and place seam down in the crock pot. Roll and add until you have 5 or 6 side by side in the bottom of the crock.
Pour 1 cup of salsa over them, and spread with a spoon. Sprinkle half of the cheese evenly over the salsa.
Fill and roll tortillas until filling is gone. Pour the rest of the salsa over the top and spread so all the tortillas are moistened with the salsa. Don't add the rest of the cheese yet.

Sprinkle with the remaining cheese, cover and let sit until the cheese melts.
Crock Pot Vegetarian Enchiladas
Adapted from recipe found at thekitchn.com
Serves 4 - 6, 2 enchiladas per serving
1/2 cup finely chopped onion
1 cup chopped sweet bell pepper
1 (16 oz.) can black beans, rinsed and drained
2 teaspoons chili powder
1/8 teaspoon garlic powder
1 teaspoon cumin
1/4 teaspoon salt
2 cups (8 oz.) shredded Monterey Jack cheese
32 oz. chunky salsa
10 - 12 8" flour tortillas, I use gluten-free corn tortillas
Spray inside of crock with non-stick.
Pour in 1 cup of salsa.
Combine onion, bell pepper, beans and spices.
Scoop 1/3 cup onto a flour tortilla. Add 1 tablespoon cheese. Roll up and place seam side down in crock.
Continue filling and rolling until you have a layer of enchiladas snugly side-by-side.
Pour half of the salsa over and spread to moisten the tortillas.
Sprinkle with half the cheese.
Repeat filling and rolling until filling is gone.
Pour remaining salsa over the enchiladas and spread to moisten. Don't add remaining cheese yet.
Cover and cook on High 2-3 hours or until filling is hot.
Sprinkle with remaining cheese, recover and let stand until cheese melts.
Make Salsa Rice. Recipe link: http://www.food.com/recipe/salsa-rice-97070

Serve with Salsa Rice and corn. Corn completes the protein of the beans.
Dessert Enchiladas
When you have a pack of 12 tortillas and the dinner recipe only uses 10 of them, then make Dessert Enchiladas in your microwave.

Spread a teaspoon or so of peanut butter on one side of a flour tortilla. Head's up: corn tortillas don't taste as good.

Add a tablespoon of chocolate chips.

And some mini marshmallows. Roll up, microwave 45 seconds until the marshmallows are gooey.

Walt got the green plate, I got the pink plate. Oh, yum. Peanut butter cup meets s'more.
Tuesday, July 31, 2012
Roasted Garden Vegetables with Spaghetti Squash (Gluten-Free)
 |
| Spaghetti squash, eggplant, yellow squash, tomatoes, peppers and cucumbers. |
When one day's harvest is as bountiful as this, I have to get as many as I can in one meal, because I simply need to eat them all. Seriously. They call to me. Here's what I came up with, it's simple, incredibly low calorie - only 231 for a very generous entree serving, and bursting with flavor.


Scrubbed, halved vertically and seeded, I placed them cut side down and added 1/4 cup of water, covered tightly and microwaved on High for 10 minutes. When they were tender, I drained them well and returned them to the microwave and set it to Keep Warm. My spaghetti squash were home grown and small, so I used two and cooked them in batches.

Meanwhile, the time was up on the veggies. I gave them a stir and returned them to the oven for another 10 minutes. I love those browned bits. Brown = flavor :) Then I dumped a jar of pasta sauce in a large pot and set it to heat to a simmer. I used Prego Garden Chunky with Baby Portabella. (Got it on sale, natch). The browned, softened veggies were gently stirred into the pasta sauce. Then the plating began.

I scraped the spaghetti squash into serving bowls with a fork.

Added the sauce and veggies combination.

And sprinkled with grated parmesan.
This is so full of flavor from the roasted vegetables that it is completely satisfying. Happy-Dance-in-the-Chair good. I had planned on serving bread and butter with it and totally forgot. Didn't matter. Walt was so happy with the healthy-ness of it that he went out and bought some ice cream. Because we had bananas to use up. I didn't feel quite so guilty eating ice cream after this meal.
Cooking from my garden makes many meals very inexpensive. For this meal I only had to buy oil, salt, pepper, garlic, onion, pasta sauce and cheese, all of which I already had in the pantry. The spaghetti squash, eggplant, yellow squash, bell pepper, and tomatoes came from the garden = almost free.
Here is a link to the printable recipe: http://www.food.com/recipe/roasted-garden-vegetables-with-spaghetti-squash-484654
And here is the recipe:
Roasted Garden Vegetables with Spaghetti Squash
1 (2 1/2 - 3 lb.) spaghetti squash, halved and seeded
1 small eggplant, peeled and cut into 1" pieces
2 yellow squash (or zucchini or one of each), cut into 1/4" slices
2 roma tomatoes, cut into 1/2" pieces
1 red bell pepper, seeded and cut into 1/2" pieces
1 cup onion, cut into 1/2" pieces
4 cloves garlic, thinly sliced
1 teaspoon salt
1/2 teaspoon pepper
1 (24 ounce) jar pasta sauce
6 teaspoons grated parmesan cheese
- Preheat oven to 425F.
- Toss all vegetables, except spaghetti squash with olive oil, salt and pepper.
- Spray an 11x17" pan with nonstick and add vegetables in a single layer. Use 2 pans if needed.
- Place into hot oven and roast 20 minutes.
- Stir and roast 10 minutes longer.
- Place halved and seeded spaghetti squash cut side down in a microwavable dish, add 1/4 cup water, cover and cook on High 10 minutes or until tender. If your microwave doesn't have a turntable, turn it often. You may need to cook it in batches, but that's fine.
- When the spaghetti squash is tender, drain well and keep warm until vegetables are done.
- Heat pasta sauce in a large pot to a simmer.
- When vegetables are roasted, add them to the pasta sauce and stir gently to coat.
- Holding the spaghetti squash half in a pot holder or oven mitt, gently scrape the strands with a fork onto 6 serving dishes.
- Top each dish with vegetables and sauce; sprinkle with parmesan.
Saturday, April 14, 2012
Two Bean Tamale Pie (Gluten Free, Vegetarian)
 |
| Two Bean Tamale Pie |
This is a regular on the rotation here as we try to eat vegetarian at least once a week. It's very quick to put together. A one pot meal that feeds the two of us very generously twice - that means I only have to reheat one night :). The flavors and textures are true comfort food. It's moist, but not saucy. If you like your casseroles saucy, add another can of V-8.
I found this recipe years ago but don't know where I found it. I made a few changes until I really liked it.
Preheat your oven to 400F and spray a 2 quart casserole with non-stick. Saute 1 cup chopped sweet bell pepper, 1/2 cup onion and 2 cloves of minced garlic in 1 tablespoon oil. Add 2 cans of rinsed, drained beans - I use black and great northern, but you can use whatever you have on hand. Add a 6 ounce can of Spicy V-8 - feel free to swap out with regular V-8 if you're not into spicy. No V-8? Use a 8 oz. can of tomato sauce and a pinch of ground red pepper. Stir in 1/2 tsp. of ground cumin and 1 tsp. Mexican style chili powder (I once bought Indian chili powder by mistake - ouch!) .
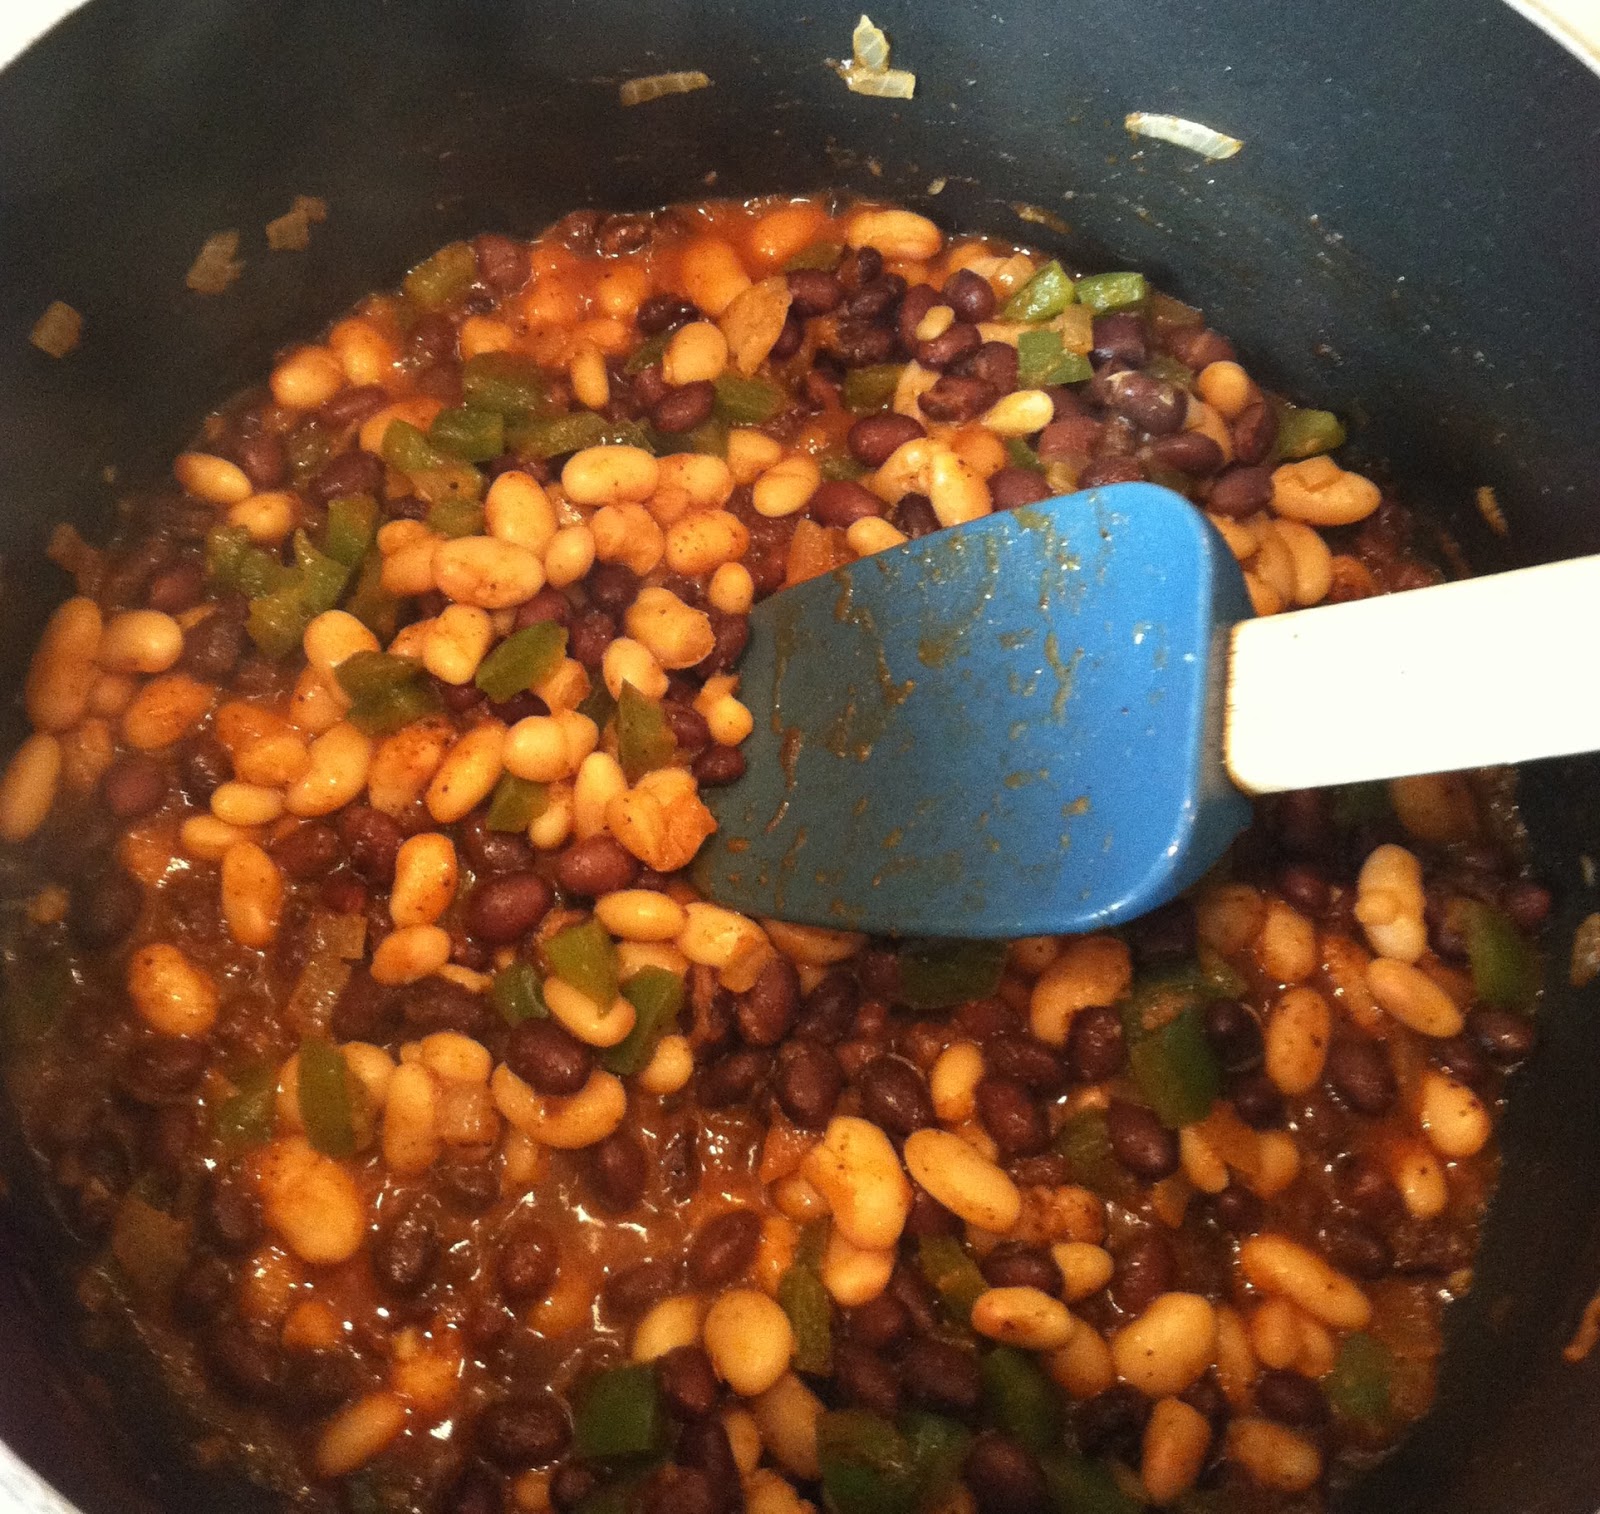
Heat it all through, then pour into the casserole you've sprayed.
Mix up a box of Jiffy corn bread* with egg and milk listed on the box; then fold in 1/2 cup shredded colby-jack cheese and 4 tsp. dried cilantro. Have fresh? Use 1/4 cup finely chopped. Don't like cilantro? Use parsley or leave out if your kids don't like little green flecks in their food.
Spread the batter over the beans and make sure it touches the side of the casserole all around. Bake at 400F 20 - 25 minutes, until golden. Let sit 10 minutes before serving.
Add a salad or fresh fruit and dinner is on the table.
*Jiffy has gluten. I use a gluten-free mix made by Bob's Red Mill. Just get one that makes an 8" pan.
Printable recipe with photo
Monday, December 5, 2011
Creamy Potato Soup

I wish I had a photo that would give you the smell of this soup. Creamy, thick, filling and satisfying. It's what we had for dinner last night and what my husband had for lunch today. He snagged the entire tub of leftovers - not that I blame him.
It's one of the quickest from-scratch soups ever. Here's how to make it:


Creamy Potato Soup
Slightly adapted from Shawn H's recipe #150863 at Food.com
4 cups chicken broth
4 cups potatoes, peeled and cut into cubes
1/4 cup onion, minced
1/2 teaspoon seasoned salt
1/4 teaspoon white pepper
1 (8 ounce) package cream cheese*, at room temperature
Optional toppings: crumbled bacon, shredded cheddar, fresh chives/scallions
Place broth, potatoes, onion and spices in a large pot.
Cover and bring to a boil over medium heat. Cook, stirring occasionally until potatoes are tender.
Mash potatoes to desired puree.
*Note: Normally I use reduced fat cream cheese, but full fat was what I had on hand. Both full-fat and reduced-fat cream cheese work well in this recipe; I don't recommend using fat-free. It has an odd non-melty quality.
Friday, May 6, 2011
Recovering a Footstool

Spring cleaning came around and I washed the twill curtains that were hanging on my slider doors. I ironed them and hung them. One panel was at least 3" shorter than the other. I've washed them before and they hadn't shrunk. Why now? What a waste of fabric. I went and bought new non-twill curtains (having learned my lesson about the vagaries of twill). I started thinking about the footstool, and the ruined curtains, and how much sturdy fabric they contained.
So I did some internet research. Do you know that there aren't ANY patterns for recovering a drum shaped footstool? Apparently, you throw them out and buy new. Not this girl scout.
I wondered, I pondered, I mulled it over and thought maybe I can cut a circle of fabric for the top, and stitch it to a length of fabric for the sides, and put some quilt padding in it to fill in where the buttons were...
So one day, I dragged out the sewing machine, the mending basket, the ruined curtains and my good scissors (that only I know where they're stored). I took a deep breath and said to myself "Here goes".
 |
| I turned it upside down on the fabric. |
 |
| Roughly cut around it. |
 |
| Trimmed it closer into a circle. |
 |
| Cut a length of fabric to wrap around the stool. |
 |
| Pinned and stitched the two together. Having the circle on the bottom and the long length on top made it easier to sew. |
 |
| Gave it a trial fit; took it off and placed a few layers of quilt batting between the fabric and the footstool.  |
Replaced the cover, upended it again, and trimmed off the excess length.
 |
| Using my handy-dandy Black & Decker staple gun I tugged the fabric taut, folded the raw edge under and alternated stapling (12:00-6:00, 9:00-3:00, 1:00-7:00, etc.) to keep it evenly centered within the top circle. |
 |
| Here it is. Please comment, I need a pat on the back after that! |
Monday, May 2, 2011
Holiday Leftovers: Ham
 |
| Scalloped Potatoes and Ham |
I used the leftover slices to make Scalloped Potatoes and Ham. This is pure comfort food. Recipes like this have been around for generations. My grandmother made a heavenly one: tender potatoes, salty ham, thick creamy sauce and onions just starting to turn sweet. My mother used to sprinkle flour over layers of potatoes, onions and ham, pour milk over it, put it in the oven and hope for the best. Usually it turned out runny and curdled looking - it wasn't very good.
I spent years pouring through old cookbooks looking for a recipe that would produce my grandma's masterpiece. The old cookbooks told me to do what my mother had done - not good enough. Some later recipes called for using a can of cream of mushroom soup instead of milk and flour. Creamy results, but the flavors were just wrong! Other recipes advocated boxed scalloped potato mixes and ham. I tried it. yuck.
So, I thought I'd just make a cream sauce like you'd make for macaroni and cheese but without the cheese and stir that into the potatoes. Yes siree, Bob! That's what I'm talking about! Tastes like grandma's.
The best part is the browned crusty bits around the edges...
Scalloped Potatoes and Ham
1 onion, sliced thinly into half moons
4 cups potatoes, peeled and thinly sliced
3 cups ham, diced
1/2 cup butter
1/2 cup flour
1/2 tsp. ground black pepper
pinch ground nutmeg
3 cups whole milk
Preheat oven to 350F.
Spray a 13x9 glass baking dish with non stick. Why glass? Gets those edges nicely crusty!
Slice potatoes and onions, put into cold water while you prepare the sauce. Why? Soaking the potatoes keeps them from turning black and soaking the onions keeps their flavor from being too strong.
Melt butter in a saucepan large enough to hold all the milk. Wait for it to stop foaming, then stir in the flour all at once. Cook, stirring constantly, 1 minute. Why? If you don't cook the flour, your sauce will taste like raw flour even after baking.
Add the milk, pepper and nutmeg and stir constantly until it thickens and boils. It will get very thick. That's ok, because the liquid coming out of the potatoes and onions as they cook will thin it out a bit in the oven.
Drain the potatoes and onions in a colander. Give it a couple shakes to remove all the excess water. Dump into a heat proof bowl large enough to hold the potatoes, onions, ham and the sauce. Add the ham. Pour the hot sauce over all. Using a large spoon, carefully fold the sauce into the meat and vegetable mixture. Try not to break any potato slices, but get everything evenly coated.
Spoon the mixture into the prepared baking dish. Cover tightly with foil and bake for 30 minutes. Uncover and bake 1 hour longer.
Serves 6 to 10.
I put the ham bone in my crockpot with an onion studded with a couple whole cloves, a large carrot, some whole peppercorns and a bay leaf. I put it on high and let it go all day; then turned it to low and let it go all night. The following day, I put the covered crock in the refrigerator to cool. I'll use the broth and meat tomorrow to make Bean Soup.
Wednesday, March 2, 2011
Crock Pot Yogurt!
I saw this recipe at Crockpot Recipe Exchange and had to try it. I love low fat Greek yogurt, but at a buck for a tiny tub, it's expensive. I also use plain yogurt as a swap for sour cream in cooking and it's almost impossible to find in recipe quantities. So, after seeing the recipe, I thought I'll make a half recipe of yogurt, use some of it for cooking and smoothies and drain the rest to eat for lunch or healthy snacking. Sounded like a plan to me!
I bought a half gallon of 1% milk and poured 4 cups of it into my small (3-4 quart) crock pot. I set it to High and set the timer for 2 1/2 hours. Once that was done, I turned the cooker off and let it sit for 3 hours without opening the lid.

 Pourable. Not as thick as I imagined it would be. But, perfect for cooking and smoothies! I poured half into a container and stashed it in the refrigerator; the other half I strained for Greek style yogurt. I lined a mesh strainer with a coffee filter, suspended it over a bowl and added the yogurt to the filter. I covered it with a clean dish towel and put that in the fridge to drain. A couple hours later:
 I had Greek yogurt! Oh, the things I can make! Tzaziki sauce for homemade gyros and fruit parfaits are the two that jumped to mind. I scooped some out, added a spoon of jam. Heaven. Oh, my. No graininess like in store bought. Not overpoweringly sour. Silky...
A couple hours later, I was notified by my lactose intolerant digestive tract that perhaps next time I should let it culture a little longer so that all the lactose was converted. My daughter did a little research and concluded that it probably didn't stay within the culturing temperature range long enough. I wondered if my cold-from-the-fridge yogurt cooled it too much or if the towel didn't maintain the heat.
So, next time, and there WILL be a next time, I'll a)allow my starter to reach room temperature before adding it and b)warm my oven for a few minutes, turn it off and tuck my crock pot insert, still covered, into the warmed oven to culture overnight. I'll let you know how it goes.
If you are wondering how yogurt fits into The Plan - it counts cup for cup as milk.
I bought a half gallon of 1% milk and poured 4 cups of it into my small (3-4 quart) crock pot. I set it to High and set the timer for 2 1/2 hours. Once that was done, I turned the cooker off and let it sit for 3 hours without opening the lid.
After 3 hours, the milk had cooled to around 90-110F. I stirred in 1/4 cup live culture Greek yogurt and 6 tablespoons (1/4 cup + 2 tablespoons) dry whole milk powder. I found that in the Mexican food aisle at Walmart. It was about $3.50 and it will last a very long time. I'll use it in my bi-weekly bread making as well. I like that it's in a resealable container.

Then I wrapped the entire crock pot in a large bath towel and left it overnight. I ended up with a pourable, silky smooth, mildly tart yogurt.


A couple hours later, I was notified by my lactose intolerant digestive tract that perhaps next time I should let it culture a little longer so that all the lactose was converted. My daughter did a little research and concluded that it probably didn't stay within the culturing temperature range long enough. I wondered if my cold-from-the-fridge yogurt cooled it too much or if the towel didn't maintain the heat.
So, next time, and there WILL be a next time, I'll a)allow my starter to reach room temperature before adding it and b)warm my oven for a few minutes, turn it off and tuck my crock pot insert, still covered, into the warmed oven to culture overnight. I'll let you know how it goes.
If you are wondering how yogurt fits into The Plan - it counts cup for cup as milk.
Subscribe to:
Posts (Atom)