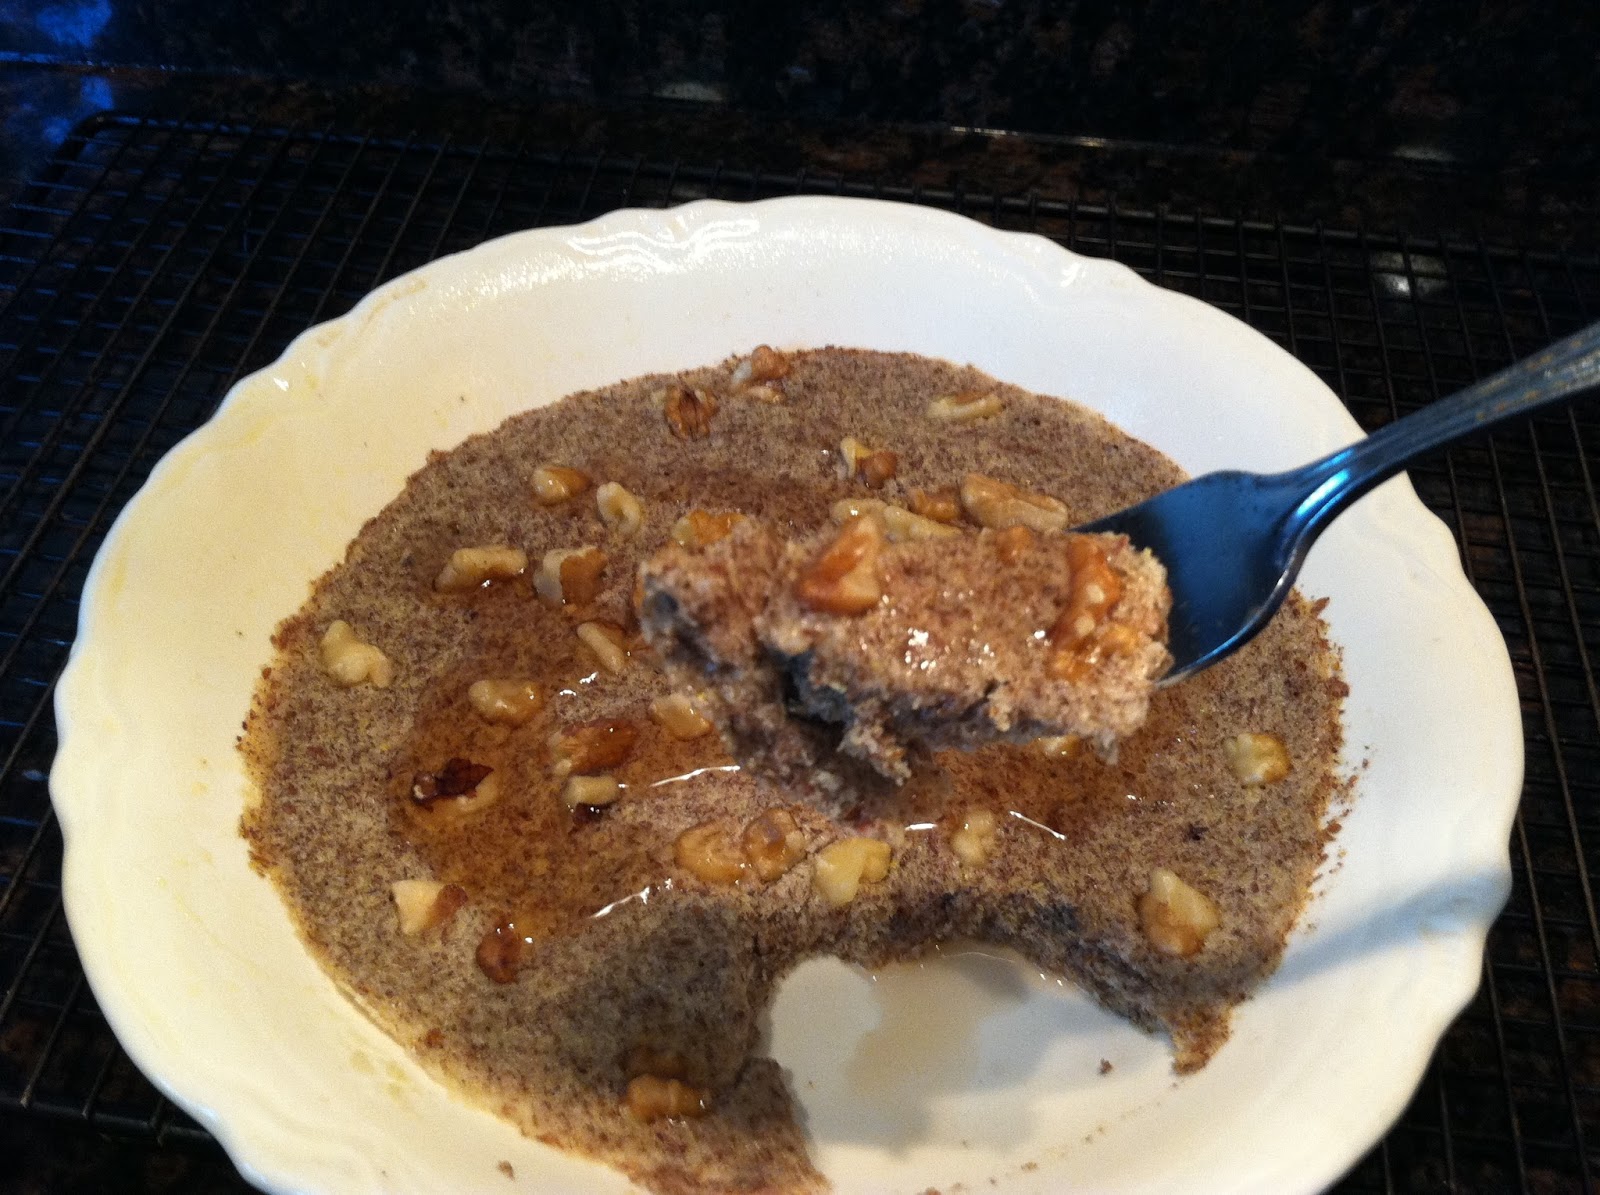
Ever notice that you really want something after being told you can't have it? I never was a fan of pancakes because I always got a tummyache after eating them. Since finding out that I'm gluten sensitive what do I crave? You got it - Pancakes!
After trying some ok and some really terrible gluten free pancakes, I found one that is wheat free, sugar free, filling, satisfying, great tasting and fast. I can have this on the table in 2 minutes. Literally.
How? The microwave! Yep, you bake this in the microwave.
The Ingredients
My BFF ground flaxseed takes center stage in this recipe. I add a little GF flour to give it a better texture, but you can leave it out. This time I used brown rice flour, other flours also work. I don't recommend soy flour, messes with the flavor.
Spray a microwaveable pie plate with non stick, add the wet ingredients and whisk.
Combine the dry ingredients in another bowl.
Add them to the wet ingredients and whisk to combine.
Sprinkle with walnuts.
Microwave 1 minute 30 seconds on high.
Enjoy with some sugar free pancake syrup.
Gluten-Free Pancake
1 serving
1 tablespoon oil
1 1/2 tablespoons sugar free vanilla syrup (OR 1 Tablespoon Splenda + 1 1/2 Tablespoons water + 1/4 teaspoon vanilla extract)
1 egg white (3 tablespoons from the carton)
1/4 cup ground flaxseed
1 Tablespoon Gluten Free flour (rice, almond and coconut are all good)
1/8 teaspoon cinnamon
1/8 teaspoon baking soda
1/8 teaspoon baking powder
1 Tablespoon chopped walnuts
Spray a microwave safe pie plate with non-stick. Add the wet ingredients and whisk.
Combine the dry ingredients and whisk into the wet until well combined.
Sprinkle with walnuts.
Microwave 1 minute 30 seconds on High.
Serve right from the pie plate. (Why dirty another plate?)
Let me know if you try this.
Showing posts with label gluten-free. Show all posts
Monday, July 1, 2013
Monday, May 13, 2013
Gluten-Free Flatbread
Pinterest to the rescue. I found this flatbread recipe Gluten-Free Flatbread. It called for Gluten Free All Purpose Flour. Every brand in the stores contain sugar. Back to Pinterest. I found this gluten-free flourmix. It's good, but the coconut flour gives it a slightly coconutty flavor that doesn't work with Pulled Pork. So I tried again and subbed Almond Meal for my Pulled Pork leftovers. I'll be trying another version of gluten-free flour blend using garbanzo bean flour soon. Then I'll have an assortment of blends and will be able to pick the blend for the recipe. The coconut flour version is perfect for sweets.
In using and revising this recipe, I found that 2 large eggs works better than the extra large egg plus egg white called for, and that almond meal is not as thirsty as coconut flour, so I had to decrease the liquid. I also had best results using the convection feature on my oven. I tried baking one cookie sheet lined with a Silpat and the second on parchment paper. Using a Silpat caused the flatbread to be soggy in the middle. Here's my current adaptation:
Gluten-Free Flatbread
2 cups Gluten Free Flour Blend (see below)
1 1/2 teaspoons baking powder
1 teaspoon salt
1 tablespoon olive oil
2 large eggs
1/4 cup unflavored, unsweetened milk (cow, almond, soy)
1/4 cup water
Place oven racks and 2 lowest positions. Preheat oven to 425F and use convection if available.
Combine dry ingredients.
Add oil, eggs and milk.
Slowly add warm water. You want a soft, wet dough.
Use an ice cream scoop to portion out 6 scoops onto 2 parchment lined cookie sheets.
Use wet fingers to smooth each into thin 5" circles.
Bake 8 minutes for convection/10 minutes regular oven.
Remove from oven and flip each using a pancake turner.
Return to oven with the pan that was on the upper rack in the lower position.
Bake 8 minutes longer.
Remove to wire rack to cool.
Store at room temperature in a zip top bag.
These are flexible; you can hold the sandwiches like a taco. They are also very filling.
Gluten-Free Flour Blend
1 cup brown rice flour
1 cup GF certified oat flour
1 cup almond flour/meal
1 cup tapioca flour
1/4 cup cornstarch
1 tablespoon + 1/2 teaspoon xanthan gum
Combine in a zip top bag.
Saturday, May 11, 2013
Easy 3 Bean Crockpot Chili
Everything gets stirred together in the crockpot, cover on, set to Low and off I go.
Stirring the crushed tomatoes and tomato paste into the raw meat will allow the meat to cook without forming large clumps. I love how forgiving this recipe is - sometimes I add some diced jalapeno instead of, or in addition to, the sweet pepper, sometimes I leave out the diced tomatoes or use ground turkey instead of beef. Prefer a vegetarian chili? Leave out the meat altogether.
After everything is combined, sprinkle the cocoa powder over the top. Once your cooker heats up, the cocoa powder will melt. You can stir it in anytime after it melts. If you try to stir it in when it's still dry, it will clump. Let it cook at least 30 minutes longer after stirring in the melted cocoa powder to allow flavors to blend. You will not taste cocoa, you will taste rich silkyness.
Notice how stiff the mixture looks. It will thin out a bit once it cooks, but this is a thick chili. If it's too thick for your taste, you can add additional broth after it's finished cooking.
Easy 3 Bean Crockpot Chili
1 lb. ground sirloin
1 (14-16 oz.) can crushed tomatoes or tomato sauce
1 (6 oz.) can tomato paste
2 tablespoons dried chopped onion
1 tablespoon paprika
2 - 3 tablespoons chili powder
1 teaspoon cumin
1 teaspoon minced garlic OR 1/4 teaspoon dried
1/2 teaspoon ground black pepper
2 (14-16 oz.) cans chili beans
2 (14-16 oz.) cans beans, drained and rinsed (black, pinto, red, great northern)
1 (14-16 oz.) can diced tomatoes, undrained
1/2 of a sweet bell pepper, diced (any color)
1/2 cup beef broth or water
2-3 teaspoons unsweetened cocoa powder
Spray interior of crockpot with non-stick.
Add ground beef, crushed tomatoes, tomato paste and spices. Stir until smooth.
Add beans, tomatoes, bell pepper and broth; stir gently to combine.
Sprinkle cocoa powder evenly over top.
Put lid on, turn on Low and cook 5 - 8 hours. It gets better the longer it cooks.
Wednesday, April 3, 2013
Skillet Chops with Mushroom Whiskey Peppercorn Sauce
I was gone a long time. Many things took up my time. Volunteering, helping my in-laws, Thanksgiving, Christmas, New Year's Eve, Valentine's Day and Easter. The best thing that took time wasn't a thing. It was a tiny, perfect human named Naomi Dawn. She is my newest grandbaby, born in February, and she has the entire family wrapped around her tiny fingers. Who wouldn't love such a happy baby?
I've gotten a wee bit smaller. At the New Year, my husband suggested we go without potatoes, noodles, rice or bread and see what happened. Yikes! My immediate thought was "What's left?!? This won't last a week!" So I started doing a little research and re-discovered The South Beach Diet. I say re-discovered, because several of our favorite meals are South Beach, BUT we had never followed the program.
Summer Squash with Parm
1 T. EVOO
2 cloves garlic, minced or pressed
1/2 medium onion, sliced
2 medium summer squash, cut in 3" strips
1/4 cup chicken broth
1/4 cup parmesan, shredded
Heat skillet over medium heat. Add EVOO when hot.
Add garlic and onions, stir to coat. Cook until onions wilt.
Add squash.
Cover and cook 3-4 minutes, turning gently several times.
Add broth, cover and cook until tender, about 5 minutes.
Serve with 1 T. parmesan cheese
Serves 4
Her older brother and sister have grown too.
I've gotten a wee bit smaller. At the New Year, my husband suggested we go without potatoes, noodles, rice or bread and see what happened. Yikes! My immediate thought was "What's left?!? This won't last a week!" So I started doing a little research and re-discovered The South Beach Diet. I say re-discovered, because several of our favorite meals are South Beach, BUT we had never followed the program.
So I borrowed several South Beach Diet books from the library and dug in. After a rough week, our starch and sugar cravings faded. Oh yes - NO sugar. Twelve weeks later I'm down 23 lbs. and my hubs is down 28. Not bad.
Here's what we had for dinner last night:
Skillet Chops with Mushroom Whiskey Peppercorn Sauce
For chops:
4 thick cut boneless pork chops
course ground black pepper
salt
1 T. EVOO
1 T. butter
Season chops with salt and pepper. Heat a cast iron skillet over medium-high heat until hot. Add oil and butter. Swirl to combine and coat bottom of skillet. Add chops.
Brown well on both sides, about 4 minutes per side; then lower heat, cover and cook an additional 10 minutes. Remove from pan and cover while making sauce.
For Mushroom Whiskey Peppercorn Sauce:
1 T. EVOO
1 T. butter
1 lb. mushrooms, sliced
1/2 cup onion, sliced
2 -3 garlic cloves, minced or pressed
1/2 tsp. peppercorns, slightly crushed (optional)
3/4 cup reduced fat, low-sodium chicken stock or broth
1/2 cup half and half
2 T. balsamic vinegar
1/3 cup whiskey (I used Seagrams VO, Jack Daniel's would also be good)
Preheat oven to 400F.
In same skillet you cooked the chops add EVOO and butter, swirl to coat skillet. Add mushrooms and onions. Cook over medium high heat until well browned (Brown = flavor), turning with a spatula every couple of minutes. It will take 10 - 15 minutes depending on the water content of the mushrooms.
Add garlic and peppercorns, stir. Add chicken stock and balsamic vinegar and stir to loosen browned bits from skillet. Add half and half, stir. Remove pan from flame and add whiskey. Bring to a boil, reduce heat and simmer until sauce thickens slightly.
Add chops and any juices to skillet. Place in preheated oven 10 minutes to finish cooking.
Test temperature for doneness. Serves 4 (6 if you're on South Beach)
Along side the chops, serve:
Summer Squash with Parm
1 T. EVOO
2 cloves garlic, minced or pressed
1/2 medium onion, sliced
2 medium summer squash, cut in 3" strips
1/4 cup chicken broth
1/4 cup parmesan, shredded
Heat skillet over medium heat. Add EVOO when hot.
Add garlic and onions, stir to coat. Cook until onions wilt.
Add squash.
Cover and cook 3-4 minutes, turning gently several times.
Add broth, cover and cook until tender, about 5 minutes.
Serve with 1 T. parmesan cheese
Serves 4
Stay tuned and find out how I make pizza without wheat flour. Gluten Free!
Labels:
cooking,
dinner,
gluten-free,
healthy,
recipe,
South Beach
Monday, September 24, 2012
Crispy Smashed Potatoes
| I've taken to making these instead of fries. |
This recipe is so easy and so yummy! Faster, easier and crispier! No measuring, peeling or slicing! Healthier than deep frying!
Choose small new potatoes - the bag will say size B. Make the "ok" sign with your finger and thumb - about that size. I like to pick out my own potatoes from the bulk bins. Yukon Gold or white skinned potatoes give a fluffy interior like french fries. I imagine red potatoes would also be good, but their waxy texture would mean the end potato will be heavier.
Scrub and cover with cool water, and boil until tender, about 20 minutes. Starting potatoes in cool water results in a tender potato. Starting them in boiling water would seem to make sense, but the hot water will cause the starch on the outer part of the potato to solidify, preventing the interior from becoming tender.
While they boil, preheat your oven 425F, line a jellyroll pan (cookie sheet with sides) with foil and oil it. Drain the potatoes, put them back into the hot pot and let the extra moisture steam away. Shake the pan once or twice. When they have stopped steaming, put them onto the jellyroll pan. Dry potatoes will be crispier.
Take a pancake turner and gently press down until the skins split and the potatoes are smashed. Do it gently or they will fly across the room. I tell you this, because it happened to me. I rinsed it off, dried it, and continued. Please don't say "Ewww" - remember, they grow in dirt.
Drizzle with EVOO, sprinkle with kosher salt and freshly ground black pepper. Pop them into the hot oven.
Let roast 15 minutes. In the photo above, I thought it would be awesome to add some fresh garlic. It kinda burned, so I would hold off on the garlic until the second roast.
When the first 15 minutes are up, flip them with a pancake turner and if you are daring, top each with a bit of fresh garlic. Drizzle again with EVOO, sprinkle with kosher salt and fresh pepper. Then back into the oven for 15 minutes.
So very ugly, and so very delicious!
Tuesday, September 18, 2012
Gluten-Free Crockpot Stuffed Peppers
This past month has been a hodge-podge of last minute meals. Time to get back to menu planning. I like to plan menus around what's growing in the garden, sales and coupons. I also plan to use up leftovers and knowing what's for dinner avoids that last minute scramble to get something, anything on the table.
This Week's Menus
I got the pork loin roast on a buy-one-get-one-free sale and the ground sirloin was free with a coupon when I bought both hamburger buns and beans. LOVE those kind of deals!
Stuffed Peppers in the Crockpot with OAMC* option
Serves 4 - 8
4 bell peppers
1 lb. ground sirloin
1 cup cold cooked rice
3 tablespoons dried minced onion (or 1 cup very finely minced fresh onion)
2 garlic cloves, grated on the microplane
1 tablespoon Italian seasoning
1 egg, beaten
2 tablespoons gluten-free quick oats
1/2 teaspoon salt
1/4 teaspoon pepper
1 (26 oz.) jar traditional style pasta sauce (not marinara - it will get watery)
Spray interior of crockpot with non-stick. Reserve 1/2 cup of pasta sauce and pour remaining sauce into crockpot.
Cut tops off peppers. Discard stems, keep tops and mince. Discard seeds. Check to see if pepper will stand upright. If it won't, trim the base without cutting through to center, so it will stand upright.
In a large bowl, combine beef, cooked rice, pepper tops, onion, garlic, Italian seasoning, egg, breadcrumbs, salt, pepper and 1/2 cup of the pasta sauce. Mix well.
Fill each pepper with meat mixture, pressing firmly, mounding it on top. *Prepare to this point for OAMC; tightly wrap individually in plastic, place in ziptop bag and freeze. Unwrap frozen and thaw upright before proceeding.
Place peppers into crockpot. Spoon some of the sauce onto each.
Cook on Low 6 - 8 hours or on High 4 - 6 hours. Test temperature for doneness at minimum time.
Leftovers reheat well in microwave.
*Once A Month Cooking
This Week's Menus
- Swedish Meatballs (Ikea), boiled potatoes, cinnamon honey carrots
- Pork Loin Roast, baked sweet potatoes, corn
- Stuffed Peppers in the Crockpot, mashed potatoes
- Crockpot Greek Lemon Chicken, rice, home canned green beans
- Pulled Pork sandwiches from leftover pork roast, cole slaw, 3 bean salad
I got the pork loin roast on a buy-one-get-one-free sale and the ground sirloin was free with a coupon when I bought both hamburger buns and beans. LOVE those kind of deals!
Stuffed Peppers in the Crockpot with OAMC* option
Serves 4 - 8
4 bell peppers
1 lb. ground sirloin
1 cup cold cooked rice
3 tablespoons dried minced onion (or 1 cup very finely minced fresh onion)
2 garlic cloves, grated on the microplane
1 tablespoon Italian seasoning
1 egg, beaten
2 tablespoons gluten-free quick oats
1/2 teaspoon salt
1/4 teaspoon pepper
1 (26 oz.) jar traditional style pasta sauce (not marinara - it will get watery)
Spray interior of crockpot with non-stick. Reserve 1/2 cup of pasta sauce and pour remaining sauce into crockpot.
Cut tops off peppers. Discard stems, keep tops and mince. Discard seeds. Check to see if pepper will stand upright. If it won't, trim the base without cutting through to center, so it will stand upright.
In a large bowl, combine beef, cooked rice, pepper tops, onion, garlic, Italian seasoning, egg, breadcrumbs, salt, pepper and 1/2 cup of the pasta sauce. Mix well.
Fill each pepper with meat mixture, pressing firmly, mounding it on top. *Prepare to this point for OAMC; tightly wrap individually in plastic, place in ziptop bag and freeze. Unwrap frozen and thaw upright before proceeding.
Place peppers into crockpot. Spoon some of the sauce onto each.
Cook on Low 6 - 8 hours or on High 4 - 6 hours. Test temperature for doneness at minimum time.
Leftovers reheat well in microwave.
*Once A Month Cooking
Sunday, August 19, 2012
Gluten-Free Crock Pot Vegetarian Enchiladas AND Dessert Enchiladas
| Vegetarian Enchiladas |
| Dessert Enchiladas |
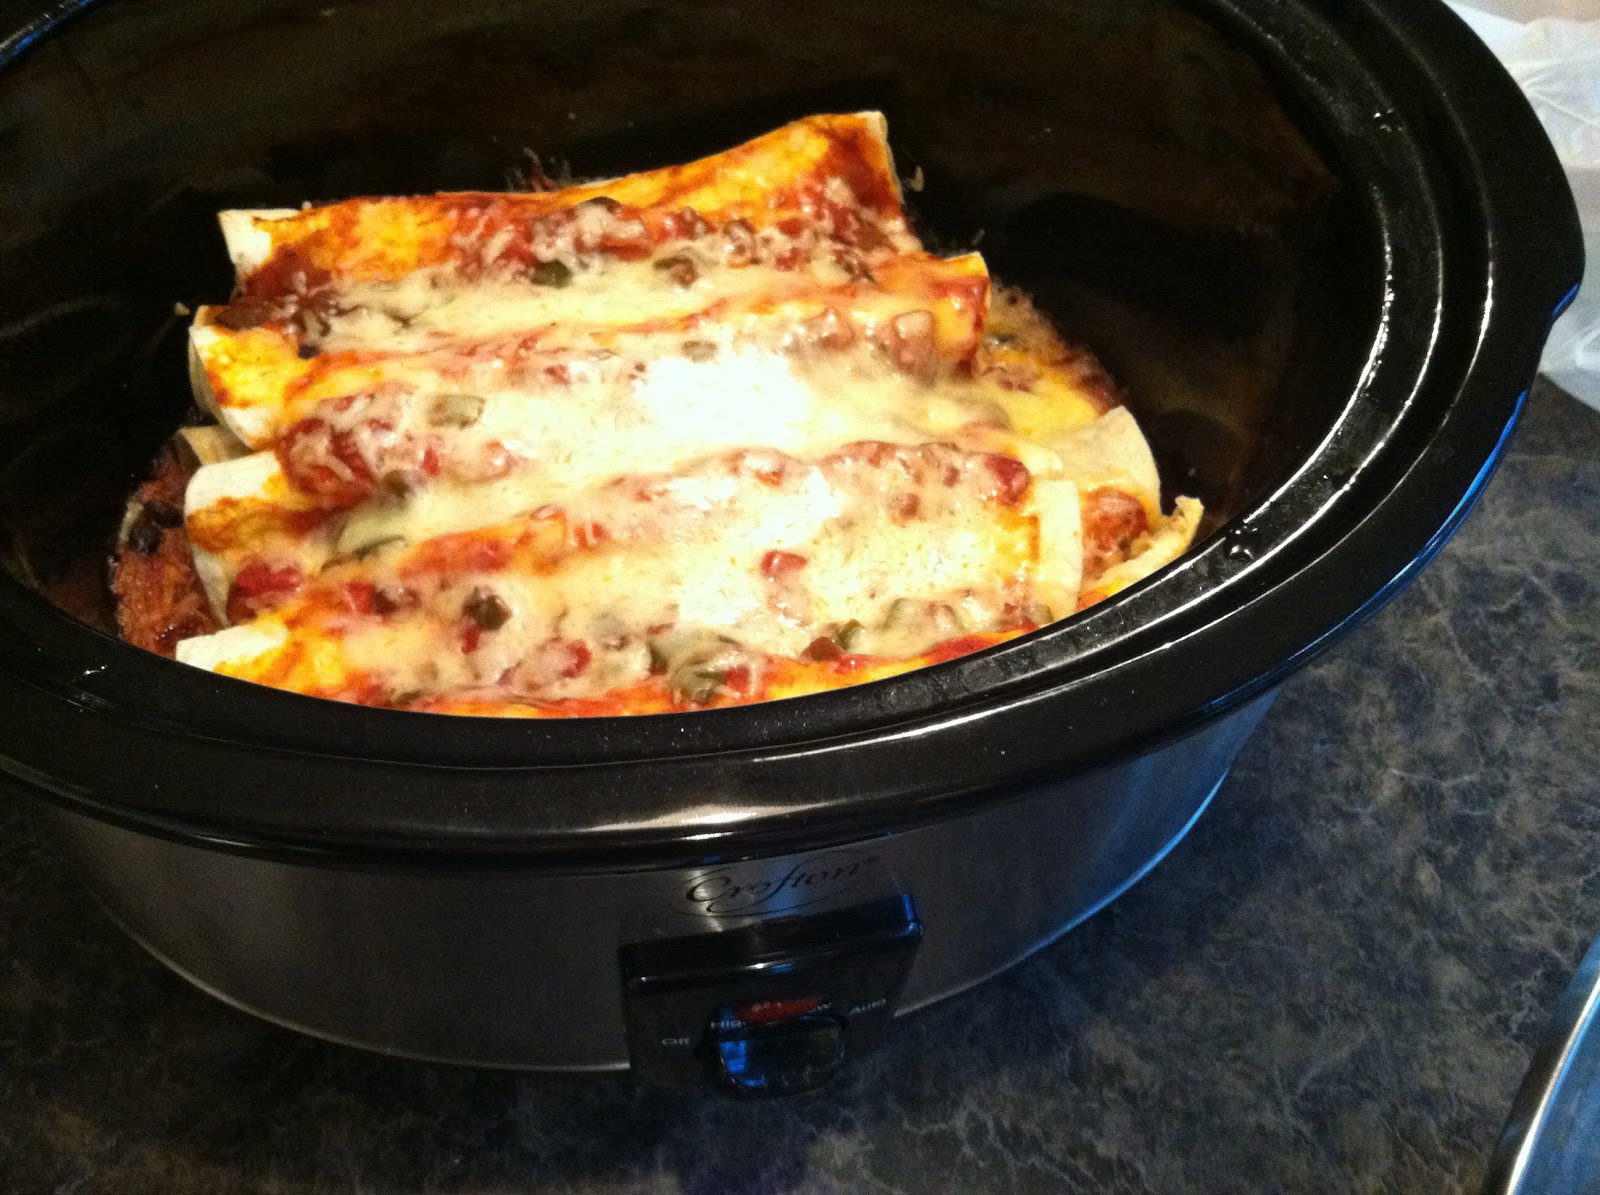
I saw a wonderful sounding recipe for enchiladas you can make in your crock pot. It needed a little tweaking to make it work for me. Oh boy! They were delicious! My darling husband said "Mmm. Wow. Make them again." Here's what I did:
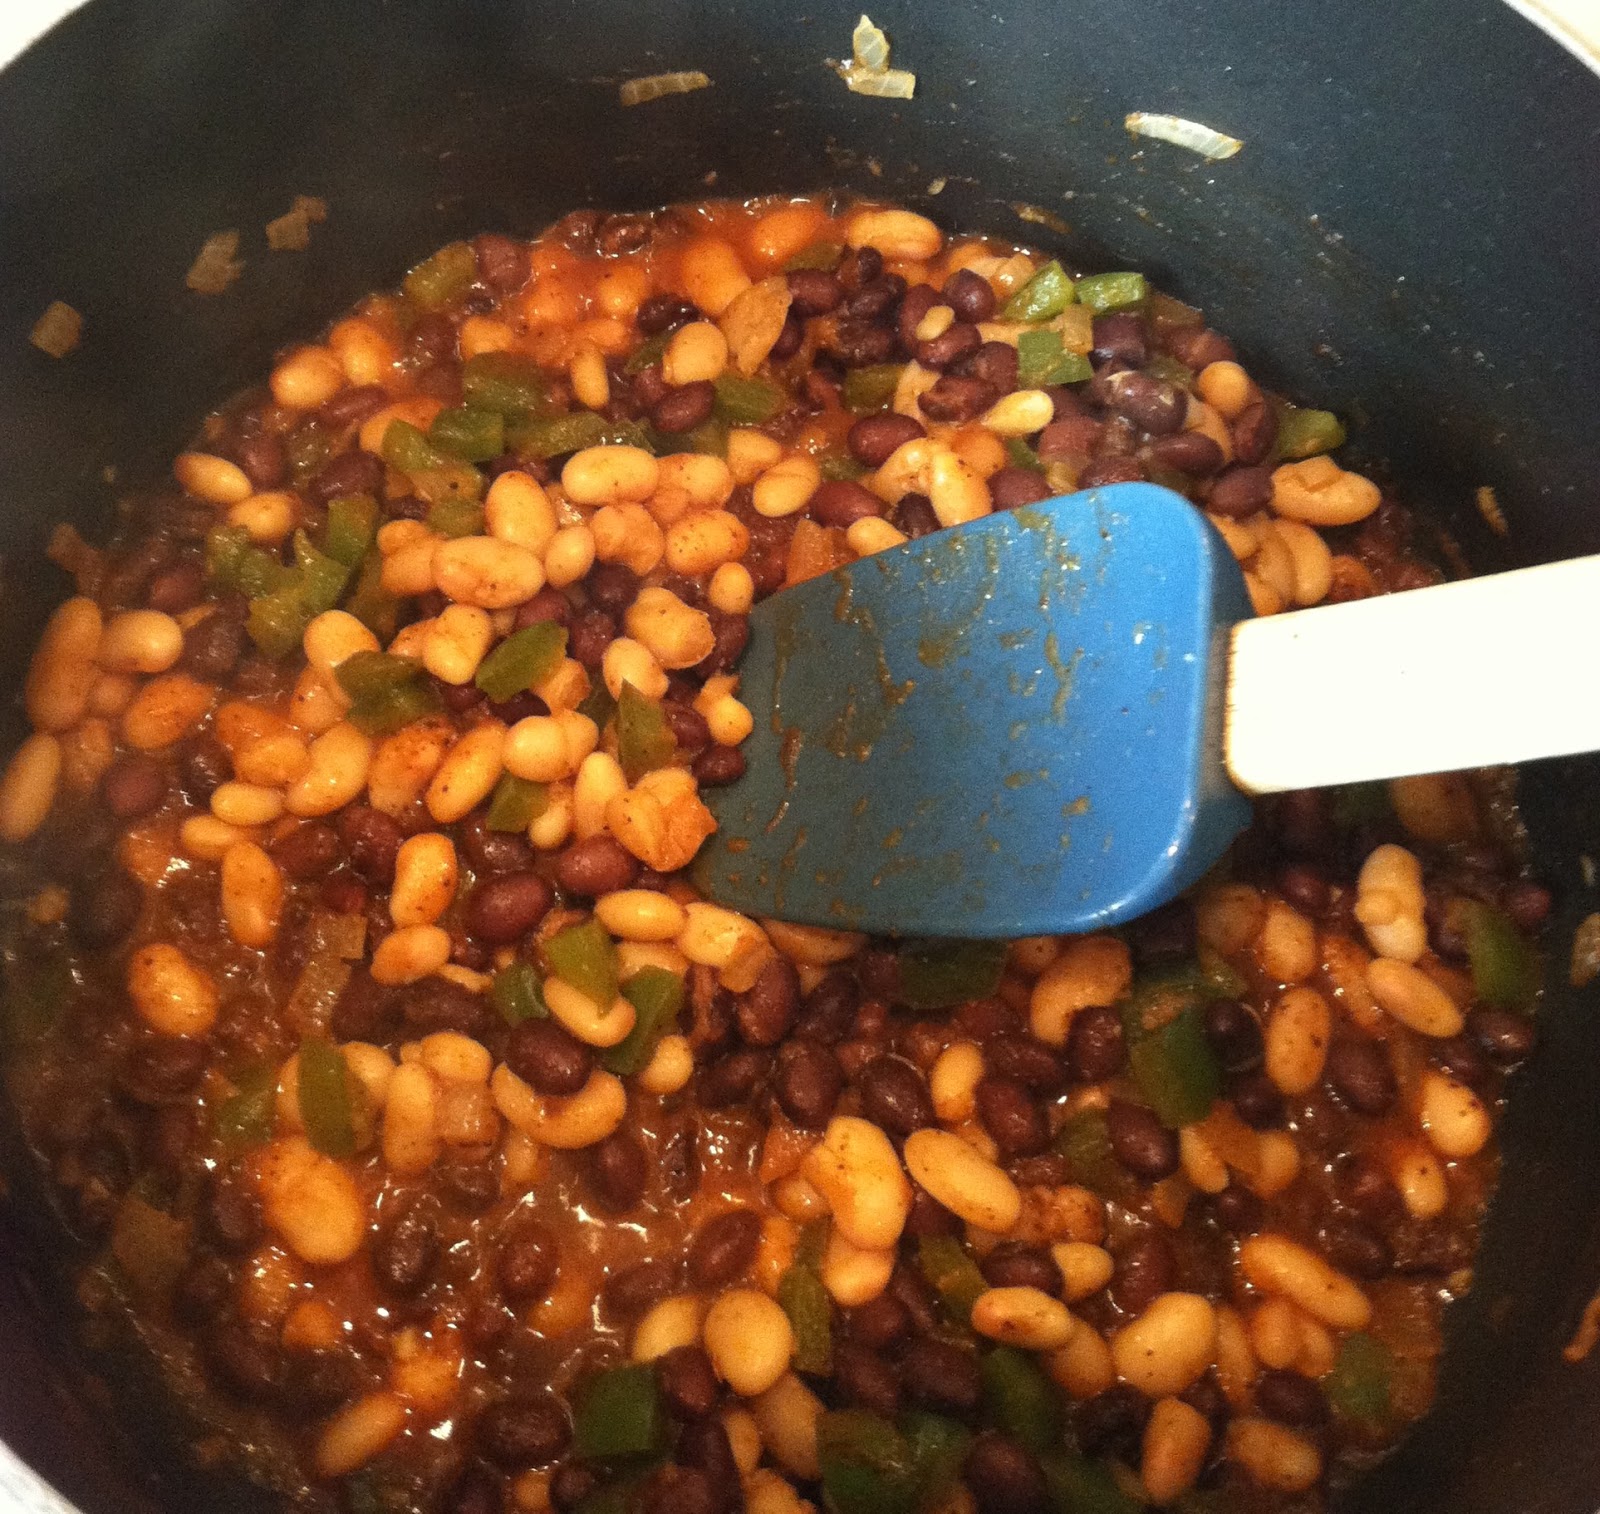
Spray the inside of your crock pot with non-stick. Pour 1 cup of chunky salsa in the crock pot. Chop some red and green sweet bell peppers and half an onion, grate 8 oz. of Monterey Jack cheese and measure out some salt, cumin and garlic powder. Rinse and drain a can of black beans and pour into a medium bowl. Add the veggies and spices and stir until combined.
Scoop 1/3 cup onto one side of a flour tortilla and add 1 tablespoon of cheese; roll up and place seam down in the crock pot. Roll and add until you have 5 or 6 side by side in the bottom of the crock.
Pour 1 cup of salsa over them, and spread with a spoon. Sprinkle half of the cheese evenly over the salsa.
Fill and roll tortillas until filling is gone. Pour the rest of the salsa over the top and spread so all the tortillas are moistened with the salsa. Don't add the rest of the cheese yet.
Sprinkle with the remaining cheese, cover and let sit until the cheese melts.
Crock Pot Vegetarian Enchiladas
Adapted from recipe found at thekitchn.com
Serves 4 - 6, 2 enchiladas per serving
1/2 cup finely chopped onion
1 cup chopped sweet bell pepper
1 (16 oz.) can black beans, rinsed and drained
2 teaspoons chili powder
1/8 teaspoon garlic powder
1 teaspoon cumin
1/4 teaspoon salt
2 cups (8 oz.) shredded Monterey Jack cheese
32 oz. chunky salsa
10 - 12 8" flour tortillas, I use gluten-free corn tortillas
Spray inside of crock with non-stick.
Pour in 1 cup of salsa.
Combine onion, bell pepper, beans and spices.
Scoop 1/3 cup onto a flour tortilla. Add 1 tablespoon cheese. Roll up and place seam side down in crock.
Continue filling and rolling until you have a layer of enchiladas snugly side-by-side.
Pour half of the salsa over and spread to moisten the tortillas.
Sprinkle with half the cheese.
Repeat filling and rolling until filling is gone.
Pour remaining salsa over the enchiladas and spread to moisten. Don't add remaining cheese yet.
Cover and cook on High 2-3 hours or until filling is hot.
Sprinkle with remaining cheese, recover and let stand until cheese melts.
Make Salsa Rice. Recipe link: http://www.food.com/recipe/salsa-rice-97070
Serve with Salsa Rice and corn. Corn completes the protein of the beans.
Dessert Enchiladas
When you have a pack of 12 tortillas and the dinner recipe only uses 10 of them, then make Dessert Enchiladas in your microwave.
Spread a teaspoon or so of peanut butter on one side of a flour tortilla. Head's up: corn tortillas don't taste as good.
Add a tablespoon of chocolate chips.
And some mini marshmallows. Roll up, microwave 45 seconds until the marshmallows are gooey.
Walt got the green plate, I got the pink plate. Oh, yum. Peanut butter cup meets s'more.
Labels:
cheap,
cooking,
crock pot,
dinner,
gluten-free,
healthy,
vegetarian
Tuesday, July 31, 2012
Roasted Garden Vegetables with Spaghetti Squash (Gluten-Free)
| Spaghetti squash, eggplant, yellow squash, tomatoes, peppers and cucumbers. |
When one day's harvest is as bountiful as this, I have to get as many as I can in one meal, because I simply need to eat them all. Seriously. They call to me. Here's what I came up with, it's simple, incredibly low calorie - only 231 for a very generous entree serving, and bursting with flavor.
Eggplant, yellow squash, plum tomatoes, red bell pepper, onion and garlic were cut up and went into a bowl. A drizzle of olive oil and some salt and pepper were stirred through.
Then onto a jelly roll pan that I had coated with spray oil. I slid it into a very hot (425F) oven and left it to roast for 20 minutes while I dealt with the spaghetti squash.
Scrubbed, halved vertically and seeded, I placed them cut side down and added 1/4 cup of water, covered tightly and microwaved on High for 10 minutes. When they were tender, I drained them well and returned them to the microwave and set it to Keep Warm. My spaghetti squash were home grown and small, so I used two and cooked them in batches.
Meanwhile, the time was up on the veggies. I gave them a stir and returned them to the oven for another 10 minutes. I love those browned bits. Brown = flavor :) Then I dumped a jar of pasta sauce in a large pot and set it to heat to a simmer. I used Prego Garden Chunky with Baby Portabella. (Got it on sale, natch). The browned, softened veggies were gently stirred into the pasta sauce. Then the plating began.
I scraped the spaghetti squash into serving bowls with a fork.
Added the sauce and veggies combination.
And sprinkled with grated parmesan.
This is so full of flavor from the roasted vegetables that it is completely satisfying. Happy-Dance-in-the-Chair good. I had planned on serving bread and butter with it and totally forgot. Didn't matter. Walt was so happy with the healthy-ness of it that he went out and bought some ice cream. Because we had bananas to use up. I didn't feel quite so guilty eating ice cream after this meal.
Cooking from my garden makes many meals very inexpensive. For this meal I only had to buy oil, salt, pepper, garlic, onion, pasta sauce and cheese, all of which I already had in the pantry. The spaghetti squash, eggplant, yellow squash, bell pepper, and tomatoes came from the garden = almost free.
Here is a link to the printable recipe: http://www.food.com/recipe/roasted-garden-vegetables-with-spaghetti-squash-484654
And here is the recipe:
Roasted Garden Vegetables with Spaghetti Squash
1 (2 1/2 - 3 lb.) spaghetti squash, halved and seeded
1 small eggplant, peeled and cut into 1" pieces
2 yellow squash (or zucchini or one of each), cut into 1/4" slices
2 roma tomatoes, cut into 1/2" pieces
1 red bell pepper, seeded and cut into 1/2" pieces
1 cup onion, cut into 1/2" pieces
4 cloves garlic, thinly sliced
1 teaspoon salt
1/2 teaspoon pepper
1 (24 ounce) jar pasta sauce
6 teaspoons grated parmesan cheese
- Preheat oven to 425F.
- Toss all vegetables, except spaghetti squash with olive oil, salt and pepper.
- Spray an 11x17" pan with nonstick and add vegetables in a single layer. Use 2 pans if needed.
- Place into hot oven and roast 20 minutes.
- Stir and roast 10 minutes longer.
- Place halved and seeded spaghetti squash cut side down in a microwavable dish, add 1/4 cup water, cover and cook on High 10 minutes or until tender. If your microwave doesn't have a turntable, turn it often. You may need to cook it in batches, but that's fine.
- When the spaghetti squash is tender, drain well and keep warm until vegetables are done.
- Heat pasta sauce in a large pot to a simmer.
- When vegetables are roasted, add them to the pasta sauce and stir gently to coat.
- Holding the spaghetti squash half in a pot holder or oven mitt, gently scrape the strands with a fork onto 6 serving dishes.
- Top each dish with vegetables and sauce; sprinkle with parmesan.
Labels:
cheap,
cooking,
dinner,
gardening,
gluten-free,
healthy,
vegetarian
Thursday, April 19, 2012
Gluten Free Cranberry Chicken and a Couple Kitchen Hints
| Remove seeds with a gravy ladle or ice cream scoop One scoop and almost all the seeds are out. |
| Contain messes by putting your cutting board in a rimmed baking sheet |
Saturday, April 14, 2012
Two Bean Tamale Pie (Gluten Free, Vegetarian)
| Two Bean Tamale Pie |
This is a regular on the rotation here as we try to eat vegetarian at least once a week. It's very quick to put together. A one pot meal that feeds the two of us very generously twice - that means I only have to reheat one night :). The flavors and textures are true comfort food. It's moist, but not saucy. If you like your casseroles saucy, add another can of V-8.
I found this recipe years ago but don't know where I found it. I made a few changes until I really liked it.
Preheat your oven to 400F and spray a 2 quart casserole with non-stick. Saute 1 cup chopped sweet bell pepper, 1/2 cup onion and 2 cloves of minced garlic in 1 tablespoon oil. Add 2 cans of rinsed, drained beans - I use black and great northern, but you can use whatever you have on hand. Add a 6 ounce can of Spicy V-8 - feel free to swap out with regular V-8 if you're not into spicy. No V-8? Use a 8 oz. can of tomato sauce and a pinch of ground red pepper. Stir in 1/2 tsp. of ground cumin and 1 tsp. Mexican style chili powder (I once bought Indian chili powder by mistake - ouch!) .
Heat it all through, then pour into the casserole you've sprayed.
Mix up a box of Jiffy corn bread* with egg and milk listed on the box; then fold in 1/2 cup shredded colby-jack cheese and 4 tsp. dried cilantro. Have fresh? Use 1/4 cup finely chopped. Don't like cilantro? Use parsley or leave out if your kids don't like little green flecks in their food.
Spread the batter over the beans and make sure it touches the side of the casserole all around. Bake at 400F 20 - 25 minutes, until golden. Let sit 10 minutes before serving.
Add a salad or fresh fruit and dinner is on the table.
*Jiffy has gluten. I use a gluten-free mix made by Bob's Red Mill. Just get one that makes an 8" pan.
Printable recipe with photo
Labels:
cheap,
cooking,
dinner,
gluten-free,
healthy,
vegetarian
Monday, April 9, 2012
Gluten-Free Warm Roasted Chicken Salad with Brown Rice Pasta
Tonight I Cleared Out the Fridge for Dinner
We had some veggies that were beginning to look a little "aged" so I roasted them with chicken breast and made this very satisfying Warm Roasted Chicken Salad with Whole Wheat Penne. It's my adaptation of Dr. Oz's Warm Chicken-Orzo Salad recipe and very healthy.
I managed to improve on Dr. Oz's nutritional counts by eliminating the goat cheese and swapping the orzo for whole wheat pasta, lowering the Total calories to 360 per serving (Dr. Oz's: 420), total carbs to 36.7g (Dr. Oz's: 41g), fat to 10.5g (Dr. Oz's: 14g), total cholesterol to 72.6mg (Dr. Oz's: 79mg). He did better on sodium, because I salt my pasta water. Leave it out and reduce the sodium to 325 mg.
Warm Roasted Chicken Salad with Brown Rice Penne
We had some veggies that were beginning to look a little "aged" so I roasted them with chicken breast and made this very satisfying Warm Roasted Chicken Salad with Whole Wheat Penne. It's my adaptation of Dr. Oz's Warm Chicken-Orzo Salad recipe and very healthy.
| Warm Roasted Chicken Salad with Whole Wheat Penne |
Warm Roasted Chicken Salad with Brown Rice Penne
Adapted from Dr. Oz’s Warm Chicken-Orzo Salad
4 Servings
30 minutes
1 pint grape tomatoes, rinsed
1 red bell pepper, seeded and cut into ½” chunks
4 ribs celery, cut into sticks, then ½” pieces
3 cloves garlic, minced
2 tablespoons extra virgin olive oil, divided use
¼ teaspoon dried oregano, divided use
1 teaspoon salt, divided use
1/8 teaspoon black pepper
1/8 teaspoon lemon pepper
1 lb. boneless, skinless chicken breasts, trimmed
1 ½ cups brown rice penne pasta
2 tablespoons bottled lemon juice
Preheat oven to 450F.
Heat water to cook pasta.
On one side of an 18x12” jelly roll pan, toss vegetables
with garlic, 1 tablespoon oil, and 1/8 teaspoon each oregano, black pepper and salt. Spread in an even layer.
Cut chicken breasts in half like a book, making 2 cutlets
of each; then cut into 1” chunks.
On the other side of the same jelly roll pan, toss chicken with 1 tablespoon oil and 1/8 teaspoon each lemon pepper, oregano and salt.
Spread in an even layer.
Roast 15 minutes or until chicken is done (160F).
When pasta water comes to a boil, add ½ teaspoon salt and
cook pasta following label directions while chicken and vegetables roast. Drain and put into a heatproof bowl large
enough to hold pasta, chicken and vegetables.
When chicken and vegetables are done, add them and their
juices to the bowl with pasta.
Add lemon juice and toss well.
Divide onto 4 serving plates.
Printable recipe for Warm Roasted Chicken Salad with Whole Wheat Pasta, substitute brown rice pasta to make it gluten-free.
Monday, January 30, 2012
Gluten-free Warm Thai Chicken Salad, Thai Cabbage and Mojito
| Warm Thai Chicken Salad |
I don't know about you, but when I read a recipe, I can 'taste' what it will taste like. And this tasted yummy. I had most items on hand, just needed to buy some limes and cilantro. I had never cooked cucumber before, and was pleasantly surprised with both the flavor and texture in the finished dish.
One of the Food.com reviewers mentioned that she served it with Thai Cabbage, so I jumped over and read that recipe. That also sounded good, and I had a bag of coleslaw mix in the fridge I needed to use up. I added fish sauce and chili with garlic paste to my shopping list.
| Thai Cabbage |
While I was at the market, I also bought some fresh mint to make Mojitos. They're not Thai, but lime and mint are common in Thai food and I thought it would go well with the spicyness of the cabbage. Joseph's was out of Fish Sauce, so I bought some Thai Seasoning Sauce. Since the first 2 ingredients are water and anchovies, I figured it would work out. It did. A note about fish sauce: it doesn't taste fishy when you cook with it. It tastes nutty and salty. It's one of those ingredients that adds Umami - a Japanese word that means deliciousness. So don't let it scare you.
| Mojito |
Wow! that Thai Cabbage was spicier than I anticipated! When I make it next time, I'll reduce the Chili with Garlic Paste by half. The Mojito helped cool everything down.
Here are links to the recipes at Food.com:
Warm Thai Chicken Salad
Thai Cabbage
Of course, I made some changes to them, here are my versions:
Warm Thai Chicken Salad
2 garlic cloves, microplaned
1/2 tsp. dried red pepper flakes
3 boneless, skinless chicken breasts, cubed (12 - 16 ounces)
1 red bell pepper, 1/2" cubes
1 cucumber, peeled, sliced lengthwise and then into 1/4" half-moons
2 green onions, sliced
1/2 cup fresh lime juice (about 2 limes)
2 tablespoons Thai Seasoning Sauce OR soy sauce
2 teaspoons sugar
chopped lettuce
chopped fresh cilantro
Chop and measure all food and have ready to add to skillet.
Heat a large skillet until hot. Spray with oil. Add garlic and pepper flakes. Stir to coat with oil.
Add chicken and cook, stirring occasionally, until browned on all sides.
Add red pepper, cucumber and onions. Stir to combine.
Add juice, sauce and sugar; bring to a boil. Cook 30 seconds.
Place lettuce on plates; divide chicken mixture among plates.
Drizzle with pan juices.
Sprinkle with cilantro.
Thai Cabbage
Sauce
2 tablespoons fresh lime juice
1 tablespoon Thai Seasoning Sauce OR fish sauce
1/2 tablespoon Thai Chili with Garlic Paste
1/2 teaspoon sugar
1 teaspoon fresh ginger, microplaned
1 clove garlic, microplaned
1 16 oz. bag coleslaw mix (without dressing), shredded style
1/2 red bell pepper, sliced in strips
2/3 cup shredded carrot (about 1 carrot)
2 tablespoons cilantro, chopped
Combine sauce ingredients and set aside.
Chop and measure all ingredients.
Heat a Dutch oven (or wok or very large skillet). When hot, spray with oil.
Add garlic and ginger. Stir to coat with oil.
Add all vegetables. Stir and cook over high heat 2-4 minutes.
Add sauce mixture, stir and cook 2-3 minutes longer, until cabbage is tender.
Sprinkle with cilantro and serve.
Mojitos are not Thai, but they are citrusy and cooling, perfect alongside Thai foods.
This Mojito is my own take on your average mojito.
Fresh Mint leaves - 1 sprig (about 6 leaves) per glass
Fresh limes - 3 wedges (half a lime) per glass
rum (I prefer a golden rum, but whatever you have on hand) - 1 shot per glass
simple syrup* - 1 shot per glass
crushed ice
Seltzer water
Use tall wide glasses. Place the lime and mint in the glasses. Muddle it (pound them mercilessly with the end of a wooden spoon).
Add rum and simple syrup. Muddle it a bit longer.
Fill glass with crushed ice.
Top with selzer water. Stir.
*Simple Syrup
1 part sugar
1 part water
Bring to a boil. Boil 3 minutes. Cool. Cover and refrigerate leftovers.
Subscribe to:
Posts (Atom)