Spines rub right off with a scrubby and cold water. My pink scrubby is from the dollar store and does a great job. After I scrub each cucumber, I run my fingers over it to find any spines that may have been missed. Then they go into a colander, so I don't keep grabbing the same one over and over.
After their bath, it's time to weigh to see how much brine to make. Most brine recipes will make twice as much brine as needed. Don't know why - just an observation. I often will cut a brine recipe in half. If cucumbers are growing like crazy in my garden, I know I'll be making more pickles in the next few days and then I'll make the full batch of brine and store leftovers in my fridge.
Time to cut off both ends. The blossom end contains an enzyme that can make pickles soft and the stem end contains an inedible stem. So, off they go.
Notice the pencil marks on my cutting board? A 4" cucumber spear will fit perfectly in a pint jar. The marks show me where to trim.
Cut them in half lengthwise, then into 4 or 6 spears, depending on how fat the cucumber is.
Three pounds, 10 ounces of trimmed and sliced spears. See the rounds on the left?
And the trimmings on the left? Salad. If I have enough, I'll make a jar of Pickle Chunks.
I just removed this jar from a pot of boiling water. As you lift out the jars, pour the water from some of them into another pot with lids and rings in it. Always prepare 2 more jars than you think you'll use and 2 LESS lids than you think you'll use. Have them at hand, but don't heat until you've filled all the jars and KNOW you will use them. Unused jars can be put back on the shelf for next time, but once lids have been heated they must be used or tossed.
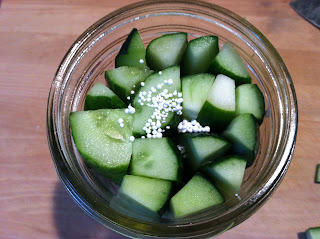
Seasonings that were not in the brine go into the bottom of the hot jar. These will be Garlic Dills, so I've added a peeled, raw garlic clove, a small dried bay leaf and some mustard seeds to the jar.
Grab a big handful of spears and drop them into the hot jar. Pack a few more, one at a time, into any empty spaces. You want them wedged firmly into the jar.
Ball Pickle Crisp is added. This stuff is amazing. Nice crisp pickles every time.
This is my First Genius Idea: I make my brine in a stainless steel teapot that I don't use for anything else. It is so much easier and tidier to pour the in the brine rather than ladling it.
Second Genius Idea: I pour the boiling brine through a fine mesh strainer, because I don't care for the feeling of dill weed in my mouth when I eat pickles.
Use a plastic knife to "bubble" the jar. With brine in the jar, it's easier than you'd think to slide in the plastic knife. Wiggle it gently between the jar sides and the pickles. You'll be surprised how many bubbles come up. The brine will sink down as the bubbles come up. Top it off with more brine. Cucumbers should be completely covered by brine. Each recipe will tell you how much empty space to leave.
Wipe the jar rim with a clean damp cloth. The sealing compound on the lids will not adhere if there is anything on the jar rim.
Use a magnetic tool to lift the lids and rings out of the hot, not boiling, water. The hot water softens the sealing compound a bit so it adheres better.
I like to grab them both at the same time.
And use the tool to slide both onto the jar. Screw only until resistance is met - finger tight. Screwing them too tightly won't let the air in the jar escape and either the lid will buckle and the pickles will be ruined, or the jar will break and the pickles will be ruined.
Lower the jars into the boiling water onto the rack. The rack is necessary to a) lift the jars off of the pot so they don't roll around and break and b) allow boiling water to completely surround the jars. The boiling water must be at least 1" over the top of the jars. I have an electric kettle full of hot water that I use to top off the pot if needed.
The water will stop boiling as you put the jars in. Start timing the recipe after it returns to a boil. Air will be escaping from the jars, which is good, but don't mistake that for boiling. Look to see that the bubbles are coming from the bottom of the pot.
When the time is up, turn off the heat and lift the jars without tilting to a heatproof surface. The sealing compound is still soft. You could dislodge the lid and allow seepage. If some seeps out, your seal will be ruined, and your pickles will have to be refrigerated and used quickly, which defeats the purpose of canning - to make them shelf stable (won't go bad at room temperature).
Cover jars with a kitchen towel and leave undisturbed until completely cool. Test each jar by pressing down with one finger in the center of the lid. If it moves up and down and makes a clicking sound, the seal is bad. Refrigerate and use within a couple weeks.
Label the jars and include what's inside and the date. It's surprisingly easy to forget what is in each jar (dill pickles? sweet pickles?).


No comments:
Post a Comment
Please leave me a comment.